Monday, December 27, 2010

Petal Cone Heart

Hi all!  today's post is  a cute heart shaped treat holder made with the brand new petal cone die from our Mini Occasion catalog from Stampin Up!  Now I have to tempt you again with all the new product.  I will be posting the mini catalog January 4th and at that time you can order!  But anywho,  this die is actually a petal cone and I have just thought once I punched it out that is could become a heart too!  So here are a few photos showing you how I did this....

You will want to punch out two hearts,  use two 6 x 6 pieces of cardstock

once punched out fold with tabs inward and add adhesive to them and attach to make a heart.

It should look like this,  now start decorating.  I used a 2' x 12' piece of cardstock that I ran through the Big Shot die called Tasteful trim for the handle.  This makes a nice sized heart that you can fill with goodies or gift card or small gift. 

Here it is up close
 

Tuesday, December 21, 2010

Santa Baby....


I just returned from running to Costco and found a really good deal ladies!  This very large resin Santa is on sale there for $5.97!  Yes!  you read that right!  I personally am not fond of gold items so I brought him home and used my metallic silver spray paint on him.  It cracks me up that the box says "Santa Bust"  too funny!

This is what he looks like fresh out of the box for those of you who do like the goldtones...


Here he is sprayed silver!  either way he looks great and all for $5.97!  Gotta love it!  xoxo
Still rushing around trying to get all the holiday things done,  I am sure you all are too!


Saturday, December 18, 2010

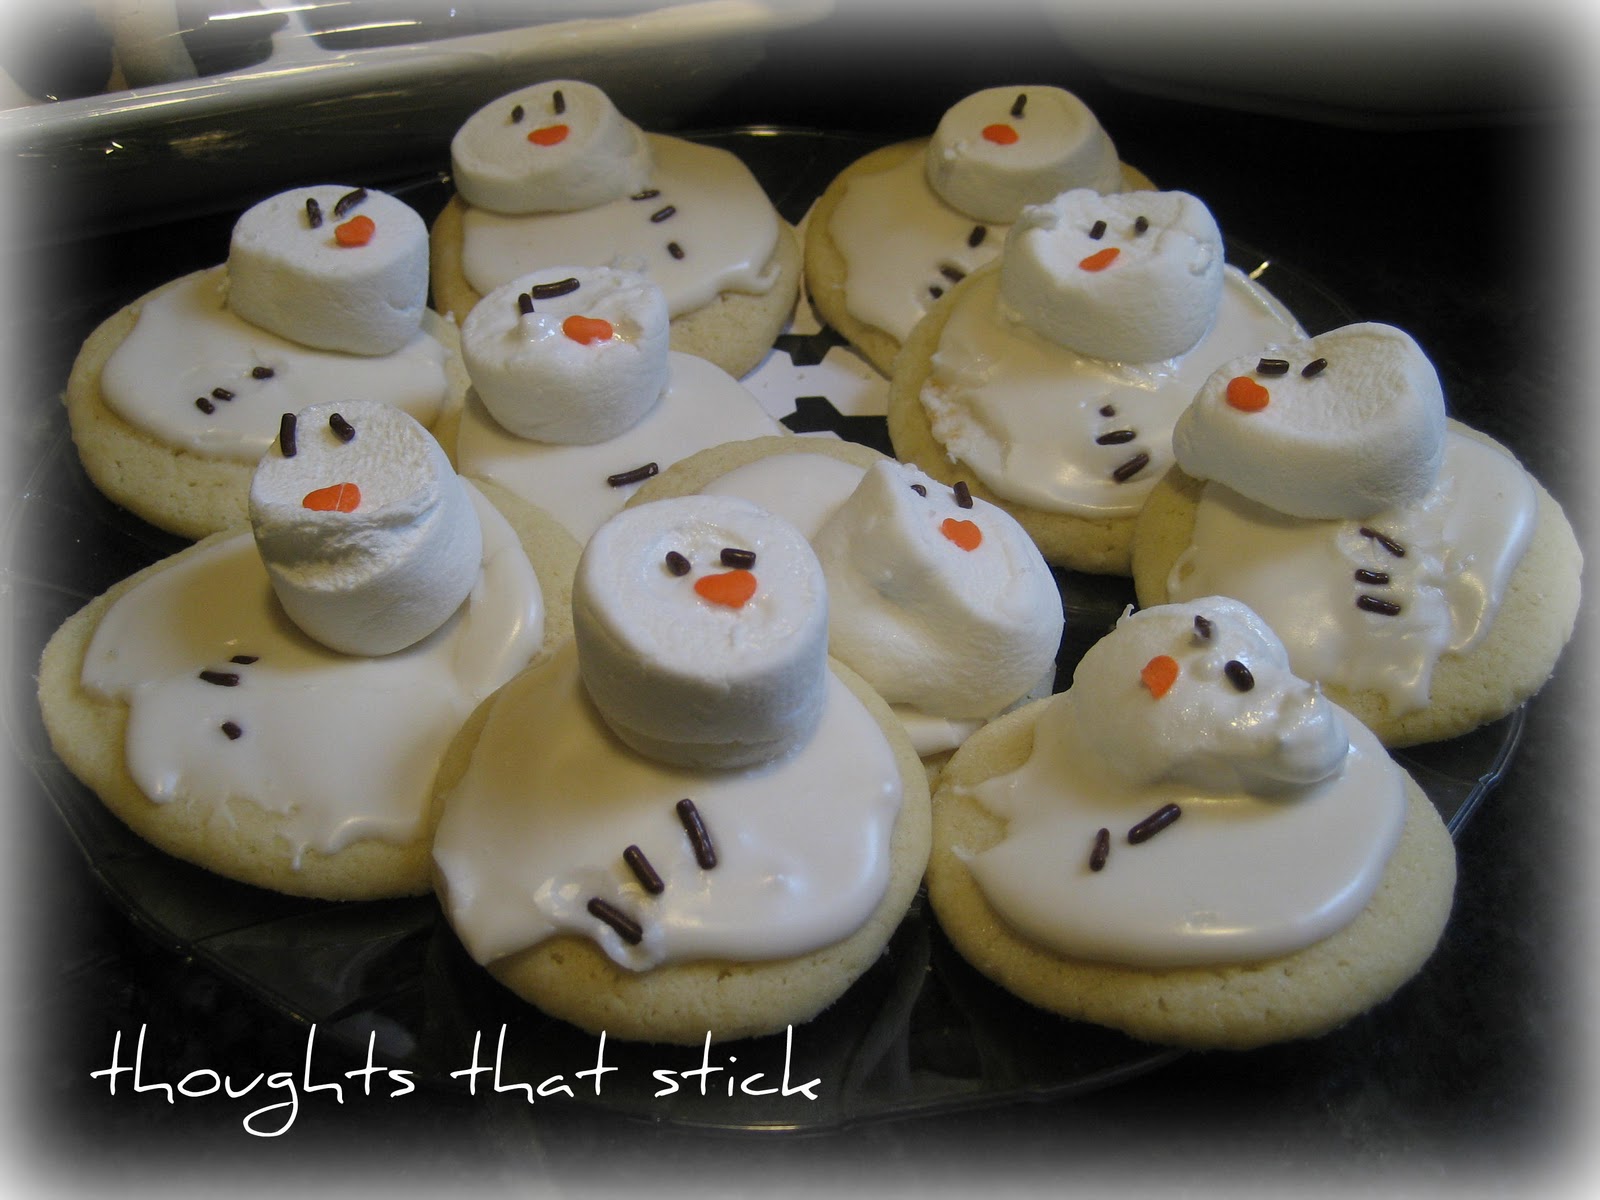
Melting Snowman sugar cookies

Been doing a little baking today.... the girls made these cute little sugar cookies.  You will use your basic sugar cookie recipe and frost them with any powdered sugar icing recipe.  After you frost them you will take a large marshmellow and cut it in half.  We put about 10 marshmellows  on a plate at once and put them in the microwave for 30 seconds,  just long enough for them to get a bit gooey.  Then put them on top of the frosting and add the nose and eyes and buttons.  We used sprinkles from a halloween sprinkle kit.  Aren't they just adorable!  xoxo

Friday, December 17, 2010

Peacock Ornament

So I think I have mentioned that we have a real live peacock in our yard.  It has been roaming our cul de sac for 3 years now, and sheds these beautiful peacock feathers.   I decided to go a bit "green" for the holdiays and use them to create these simple ornaments.  And aren't they fabu!  Who knew they would make such a beautiful simple ornament!  I bought the large flat glass ornaments at the local craft store and rolled the feathers up and dropped them in the hole.  Shake them around just a bit and they will lay flat inside the ornament.  Easy!   xoxo

Here;s what I started with........
        

Tuesday, December 14, 2010

Ornament Card


Here's a fun and easy card for you! Here's recipe:

Stamp set: Season of Joy
Cardstock: Old Olive # 100702, Cherry Cobbler #119685, Whisper White #100730
Brushed Silver # 100712,  DSP Jolly Holiday # 117159
Accessories:  1 3/4' Large Circle # 119861
Basic Rhinestones   #119246

You can order any of these products HERE

Sunday, December 12, 2010

Christmas Ornaments

Check out these cute ornaments!  They are made with 4 inch styrofoam balls.


Here's what you need:  4 inch styrofoam balls, 1 sheet of 12 x 12 inch scrapbook paper, a scallop punch. You will use the entire sheet of 12 x12 for this project.   Punch out as many scallop circles as you can from the sheet of paper.  Heat up your glue gun.  Take the scallop circles and fold them in half and then in half the other way, then in half one more time.  See photo below to see how it should look.

Then take all folded scallop circles and start glueing them to the styrofoam ball until it is all covered.  You will then take a ribbon of your choice and cut it at 9 inches long.  Take a sewing pin and pin it to the ball. Cut another piece of ribbon 5 inches long and tie a bow and add to the ornament.  That's it!  These come out so cute and are quite large once completed.  Have fun making these!  xoxo


Saturday, December 11, 2010

Gift Card Holders


Morning Ladies! Check out the cute vintage gift cards I found, arent' they cute!Here are some quick easy gift card holders made out of the large clear Big Shot circle die. Take your cardstock and fold in half over the circle to cut to give you the fold then take a piece to make the half pocket for the gift card to slide into.  Attach the half pocket with adhesive and started decorating.  The tab at the top is just a 1/2 inch piece of cardstock folded over and attached with our glittzy brads. Here are the products you need:

Big Shot Clear Circle Die # #114533
Cardstock:- Baja Breeze  # 111362
Cherry Cobbler # 119685, Blushing Bride #111351
Candy Cane Christmas # 120809
Scallop Trim Border # 118402
Glittzy Brads #121003

You can order these products   HERE