Sunday, January 31, 2021

Yarn Hearts


With Valentines day just around the corner
I finally took down my paper snowflakes and decided
to add some Valentine's decor.
I made these cute yarn hearts and even though I used 
some natural colors, they sure will look adorable in
red and pink too!


I have some blue decor in my home too so I made
these four different colors. 


Aren't they cute!


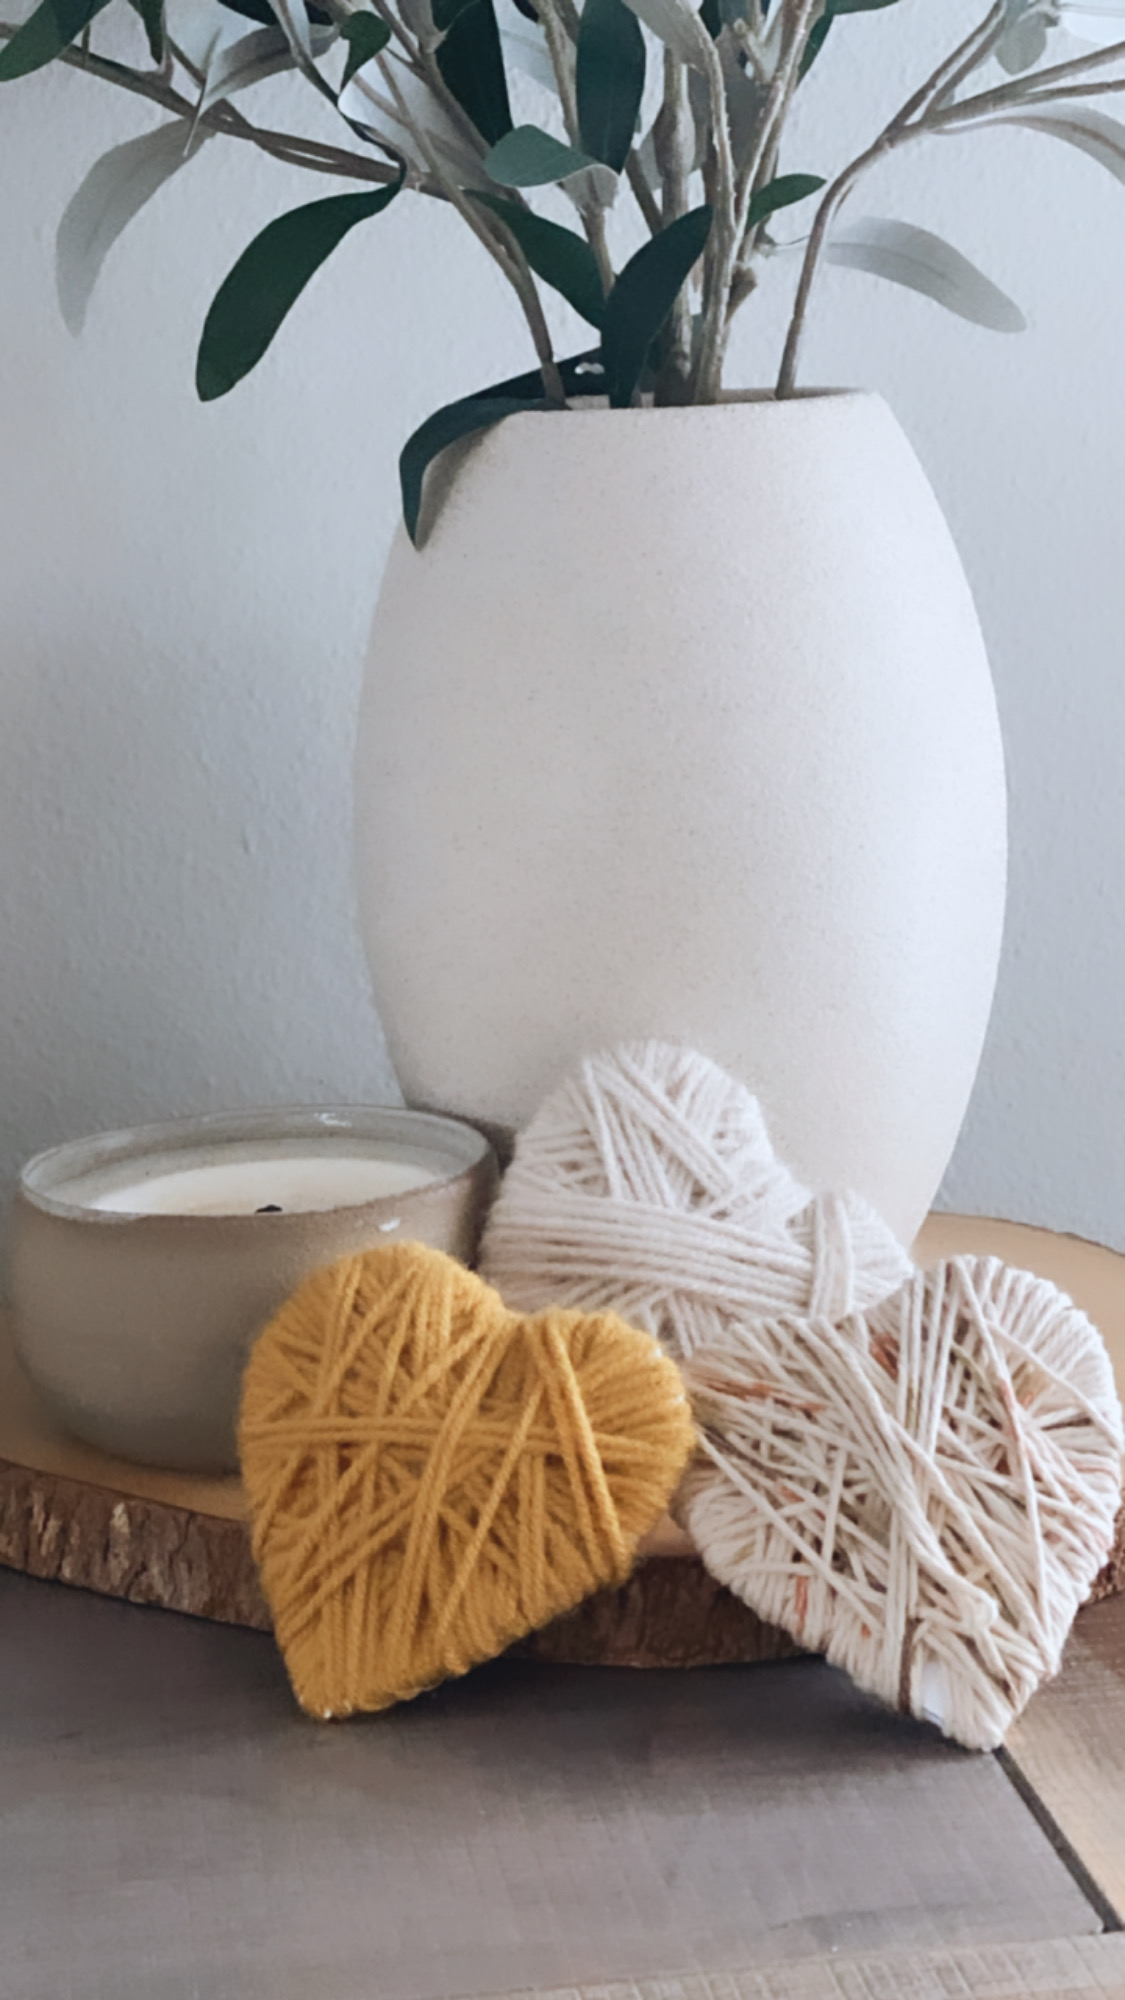
Here they are up close,
one is all creme colored, one is creme with
speckles of mustard and black and the other is mustard colored.
The skeins of yarn I found at the Dollar Tree.


To make these hearts start with 
either cardboard or what I had on hand which 
is foam core board.  Use what you have on hand!


Hand draw a heart on your cardboard
or foam core board, cut it out.
Then using your yarn, tape it to the back of the heart.
Start by wrapping the yarn around the heart, keep
going til you have the heart completely covered.
Take the last piece of yarn to the back of the heart and
tie off by making a knot.  


Just keep going, back and forth like in 
the photo above.....
Here they are all done below,
scatter them around your tables or in bowls
or just sitting out.
I am going to try pick up some red and pink 
yarn this week to make some
Valentine ones.
I hope you give them a try!


Thursday, January 28, 2021

Love


Love is in the air!
This heart wreath is made with a heart mask,
I'll show you this technique fuller down. 


The pink plastic hearts were in this month's 
Paper Pumpkin
I used three different color green inks to create
the wreath by stamping the lightest to the darkest


I cut a heart from white paper,
laid it on top of the cardstock you are going to
stamp on, stamp each color starting with the
lightest to darkest. 


Look at this photo below,
you can see how I stamped around the heart in the
first green color.... super easy. 


I used white cardstock for the background
and added the green and pink cardstock to
match the pink hearts. 
Stamp the LOVE in the center and there you go!! 


Tuesday, January 26, 2021

Mountain refuge


We snuck off to the mountains for a day
this weekend for a cold but beautiful hike along
the Cle Elum river.  It certainly didn't disappoint
with clear blue skies and sunshine on our faces.
It was a cold 27 degrees, but we didn't even notice it.


My youngest......


So thankful for this time away and that our girl
was with us.  Their lives are so busy now we
just don't get to do as much together as we used to.
New season to embrace for sure!


This is a cute little fish shed along the hike


Where ever we walk our eyes are always peeled
with open to find hearts, 
we were lucky this day!


Sunday, January 24, 2021

Love is in the Air


Love is in the air......
Now here's a quick and easy card for you.
Using a piece of crumb cake cardstock as the base
fold it in half and add the white buffalo plaid
cardstock.  Cut out a heart,  I used the heart framelits
to make the heart and hand drew the rest.
The center "love" is stampled bu
using a embossing folder


I added some black ribbon to
side of the card and tie a bow. 
The "love" is from this month's 
Paper pumpkin called Sending Hearts,
but you can use any Valentine saying you
have on hand.  


Friday, January 22, 2021

Sending Hearts


How can Valentine's day be this close?  Seems like we just were
celebrating Christmas!  Take a peek at the video above to see this
month's Paper Pumpkin.   As you know I love to change things up 
a bit.   One thing I love to do is use past Paper pumpkin stamp sets
to incorporate with the new.                            


You probably saw in the video that this
card looked just a little different.
I used the envelope with the hearts 
stamp from last year's paper pumpkin.
To make it pop out of the mailbox
I used an exacto knife to make an opening
to insert the envelope in. 


I added a little gold glitter to the hearts to 
jazz it up a bit. 
The fun thing about Paper Pumpkin is everything comes
in the kit to create everything you need to make
these cards that come in the kit.
Everything is pre made and stamped and cut out for you,
you just assemble, or in my case change things up!
If you are interested in receiving Paper Pumpkin monthly
you can click on the link 

If you are looking for something creative and fun to do
(and easy I might say!)
This is the craft for you!


Wednesday, January 20, 2021

Beary Comforting Valentine


Annnnnd........ he returns again!
This little bear is just so cute no matter what you
do with him!
This time I add a little sucker in his hands
and a cute little buffalo plaid bow


I used my glue gun to attach the sucker,
I tried a couple other attempts to attach it
by punching small holes where his hands are, 
but this seemed to be the easiest way to attach it.
The background is made with a heart embossing 
folder and backed with black paper. 
Are you making Valentine's this year?


Sunday, January 17, 2021

Mason Jar Valentine


It's so refreshing to be making something sweet
to give those you love!
This cute card was made with our new plastic
Mason Jar shaker domes.  Super cute
and easy to use in your cardmaking.
They have adhesive already on them on the
front and the back.  And by using the hand held
mason jar punch it makes it easy to punch 
the jar out. 


Stampin Up! Mason Jar Shaker Domes 

Stampin Up Mason Jar punch


Wooden Mini Conversation Hearts


To make this card, decide what your background paper
is going to be.  I chose a pink cardstock and ran it through
a heart embossing folder to make the heart background.
Punch out your jar from the cardstock and a piece for the back side
of the jar that you will attached it to and also stamp a saying on. 


I chose to put mini conversation hearts in my jar, but 
you could use beads confetti etc. 
Set whatever you are going to put in the jar on
top of the cardstock before you add the plastic
dome over the top of it to enclosed it. 
I added a small buffalo plaid bow to the jar
to finish it off.
So sweet!


Friday, January 15, 2021

Beary Comforting Valentines


Welcome back for some more of the Paper Pumpkin
Beary comforting alternative ideas.
See the little envelopes above?
They are in the kit for the gingerbread houses, but
I decided that they would be of great use
for a Valentine treat holder. 


Using the envelopes and the bear in the stamp set,
I stamped the bear directly onto the envelope
in Espresso ink.
Taking an exacto knife I cute away one of the hands 
of the bear so that I could attach the heart so that it looks 
like he's holding it.
The heart can be punched out of a heart punch of using the heart framelits and the big shot. 
I stamped "love ya" which also comes in the set and covered
the heart in dazzling diamonds to complete it. 


I used pink chalk to give his cheeks some color
and filled the envelope with the conversation hearts.


Take a hand held hole punch to punch the
holes in the top to close off the envelope
and add the twine. 


All done!
So cute to gift to any age!
Come on, who doesn't want to be your
Valentine!
You could also fill them with chocolate
hearts or M & M's, any type of treat. 


Wednesday, January 13, 2021

Valentine Bombs


I am sharing these AH-MAZING! bath bombs today,
This is a company I found on Instagram called
"Life around 2angels"
I purchased the 12 pack of bombs with all different 
scents in them.  The whole box was $26!
You will love them!
So I thought it would be fun for Valentine's day
to wrap them up for friends....
Here goes.....


Starting with the bombs, some black tissue paper
silver twine and gold washi tape we are going to wrap 
these bombs up!


Starting with the bomb, set it on top of the tissue and
twist it closed at the top.


Cut your silver twine about 3"and starting at the top
of the bomb where you twisted it, using the washi
tape start to tape and twist the washi tape around the twine
to create the "fuse" at the top of the bomb. 
Twist it a few time to create the stem and fuse.


I cut out a pink tag and stamped
Happy Valentine's day on it and hand
wrote "you're the bomb"
and added the gold heart sticker.


Here's a close up of the "fuse" so you can
see a bit better how I twisted it.
Didn't it turn out cute?
Ya'll are the bomb!