Thursday, June 29, 2023

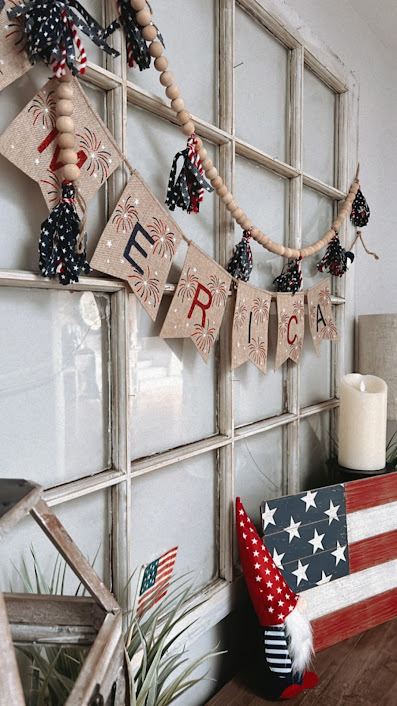
4th of July decor


Freedom is a gift that is given by all those who fought for us.
This Independence day as you celebrate with your family and friends,
express thanks in your heart for your freedom and for taking part in a nation that allows us to live and walk as a free person. 
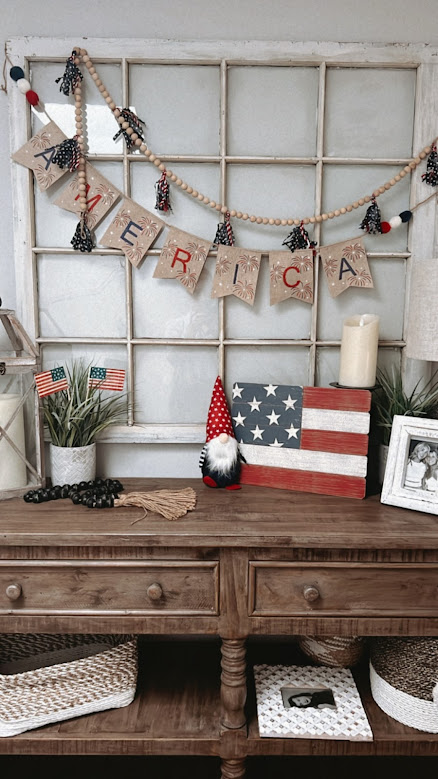
Sharing a little 4th decor in the corner of my home. 


The wood beads are from my Etsy shop, the other
items were picked up here and there.
Do you have fun plans for the 4th? or do you pefer to stay home?


Tuesday, June 27, 2023

Lavender seal


Happy tuesday!
I am back in the my studio office trying my hand using my wax seals again.  I always forgot how much fun they are and how creative you can get using them.  
I have quite a few lavendar bushes in my yard and I really do use the clippings from them for so many things. 
Today I am showing you how to make a card using fresh lavendar.


What is needed to make a cards like this?
fresh lavendar, sealing wax and a wax stamps and
cardstock for your card. 


Cut your cardstock to your desired size.
Lay across the card your lavendar how you want it to go.


The wax stamp that I chose to use says "with love"
Something that I do with my stamp is set it on top of a little ice 
pack to keep it cold so when you go to stamp into your wax
the stamp with cool the wax quickly and release from the wax.


Light your wax to start melt the wax,
let the wax drip onto the stems of the lavendar til
you get a good round mound of wax.
When you feel you have enough wax melted
take your stamp and push it right into the wax, hold
for a few seconds and release.  Behold the beautiful image!!!


Look at how the wax spread and created an almost flower
petals around the sides.   Just beautiful.


The lavender will eventually dry and will continue to smell
so yummy!  You can use a slightly larger envelope to send off this card, otherwise you can add it to a package to gift or just gift it to someone. Have fun trying this out! 


Sunday, June 25, 2023

UPS Thank you's


Does UPS visit your house much?
I hate to say it, but it seems we get lots of visits from UPS.
With that said,  I wanted to have a little basket with some snacks for the drivers. 
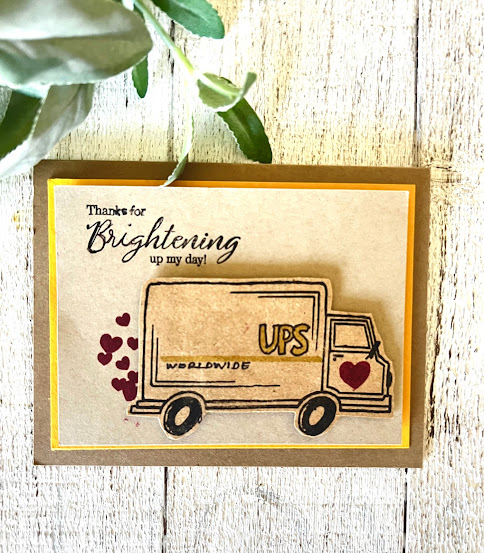
I made this card to hang over the basket to thank the drivers. 


This stamp set is called "special delivery" just perfect
for this card. 
I just layered up some crumb cake cardstock with some daffodil delight and stamped the truck on some kraft cardstock and cut it out. 


I hand drew the UPS and "worldwide" on the side of the truck. 


Here's the little basket I set out on my porch for the drivers with
the little sign attached. 
Little random acts of kindness matter.....


Friday, June 23, 2023

Barn Quilt


Happy friday!
I've taken some time this week to make this wood barn quilt.
Have you heard of them?
Where we live, they are all over the place.
 You paint the design and then hang them on the outside of your home or garage or out buildings.


I started with a 3' x 3' piece of wood I had laying around the garage.
It would be better if you were to pick up a smooth piece of wood.
Mine is like a press mdf pressed board.  It still works but I a smooth
piece would be even better. 
So since the board is 3'x'3 piece I had to section off 9", 18" and 36" sections.  Once you have penciled in all the squares you then will have to decide on a design.  You can google barn quilt designs to help you find and determine what you'd like your barn quilt to look like.
Once you find a design it shows how you have to create the triangles within the squares to make the quilt. 


When you have penciled in your design and figured out what colors you'd like your quilt to have you will need to start taping off the color blocking.  Since mine is white and black I only have two colors to work with.  You might choose many colors, if so put in pencil writings
 in each box the color of the triangle so you know which color goes where. 
Keeps confusion down. 


You will find you cannot tape off the whole board at once due to the 
fact the tape will be taped over the opposite color.
So it is best to wait for the sections you painted to dry
to be able to remove the tape and then tape the sections
that need paint. 


See below how messy it looks painted?
I'm using outdoor latex paint by the way. 
Don't worry, you are going to lift the tape and have straight painted lines once it drys. 


The gray you see is primer.  I painted primer to the board before painting it.  Now onto adding the white paint sections. 


looking good so far~~~


Love how this turned out!
I think it needs some finishing to it, so I might go to Home Depot to find some trim to frame it. 
What you do you think? 


Once I frame it and hang it I will share the final look! 


Tuesday, June 20, 2023

Happy Happy Birthday!


Happy Happy Happy!
Happy tuesday!
I created this card with the new in colors inks.
Stamp the "happy" in three different colors and then choose
a coordinating color for your "birthday"
Cut the "happy" out and stagger them on each 
top of each other adding the birthday at the bottom.
I created the pennant by cutting out a triangle then
glueing it to a toothpick.


The background paper is vellum cardstock 
that I ran through the big shot with the crinkle
embossing folder and topped it off with the sequins. 
Try this out!  Try using some bright colors too.


Saturday, June 17, 2023

Clearance items


Happy saturday!
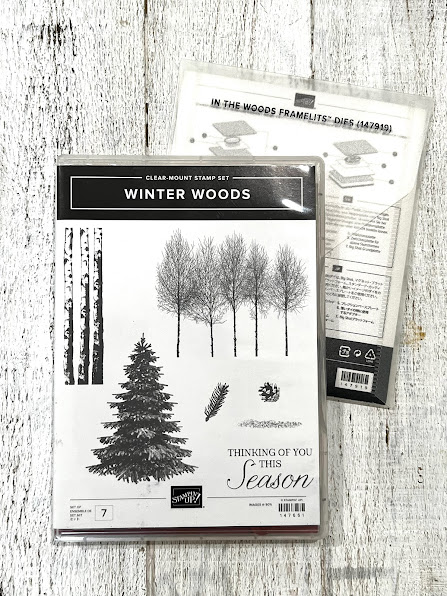
Listing some stamp sets with matching dies today.
Are you looking for any of these great sets?
I'm making room for the new products coming out so I can show you all the fun fall and holidays things coming to you soon!
Each set with matching dies are $20 total with shipping.
Message me if you'd like any you see.......


All the set are in great condition and dies are all there.
Have a wonderful Father's day weekend all! 

Thursday, June 15, 2023

Storybook Gnomes


Feeling a little whimsy today.
Had to make a quick card for someone and thought this fit the bill
for them.  Its the Storybrook Gnome paper.  Super cute


There are so many cute little images on this paper
that can be cut out and popped up. 
I added some sparkly glitter to each of the toadstools.
Here's to some whimsy!


Tuesday, June 13, 2023

Boho Beach Kit


                                                 Hello!
Check out this new kit called the Boho Beach kit!
Super cute card and the colors of summer!
This isn't a Paper Pumpkin, it's one of the kits offered similar to a Paper pumpkin but you can get it anytime and as many as you'd like. 


What do you think? does it scream summer?  and what about that gorgeous marbled background paper?  so pretty!  The colors are so calm and serene, just as the beach should be. 

                                
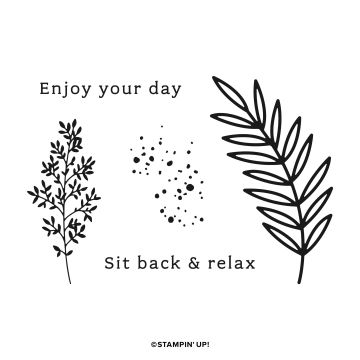
The kit comes with everything you see above as well as the stamps below.   If you like to order the kit click   HERE  it's $22

                                 BOHO BEACH KIT (ENGLISH)

So sit back and relax and take your friends and family to the beach from the comforts of your home with this latest kit.   Evoke peace and relaxation with this kit.  Your friends and family will love to get a homemade card from you.  
      

Sunday, June 11, 2023

Welcome Inn


Happy Sunday!

You won't want to miss this Paper Pumpkin!
Take a look at a new feature that will be added,  DIE CUTS!!  yep!
get excited about that!  As far as I know we have never added any dies to our Paper Pumpkin kits.  Not only is this exciting, take a look at the fresh look of spring/summer of the kit.
  It almost has a Scandinavian flare to it.  Can't wait til mine arrives!  And if you are already a subscriber, head on over to order yours. 
 You can order just the one kit or get signed up to receive kits on repeat monthly. 
 Take a look at how you can customize how you want to receive them.  You get everything
you need in the kits to create the cards or projects sent. 
 So worth the value.  

Are you as excited as I am?
I can't wait to see the rest of the kit, in my hand that is!
So if you'd like to order, head over 
HERE  to order 

Friday, June 9, 2023

Using your fresh Rosemary


Happy friday friends!
Do you love fresh Rosemary? 
Is it growning in your garden?
If not,  pick yourself up a small container of it this weekend
and plant it.  I love to have it on hand at anytime of the year.
It grows very well in all regions and basically grows like a weed.
Once in the grow it takes off and the bushes just keep getting bigger
and producing well.
I just wanted to share a few fun ideas for you to use your fresh Rosemary.
This first picture is rosemary bagged and ready to gift to a friend, 
how cute of an idea is this.  You can buy them planted this small
or if you have plastic planting containers you can take a small portion
and plant them to gift.  They are set inside of a small lunch sack
and tied off with a striped bow and tag. 


The next way you can use your rosemary is making rosemary simple
syrup.  This can be used in the kitchen to transform homemade cocktails an non-alcoholic drinks as well as your baked goods!
It just take three ingredients to make it!  Water, rosemary and sugar!


Looking for a quick tablescape idea?
Any clear vase or jar works well for this setup.
This one is a clear vase with a candle and rosemary
scattered around the sides.  Smells so good!


And one of my favs is taking some olive oil, it can be a bottle or small container like this.  Add the olive oil and some sprigs of rosemary. Now you have some tasty rosemary olive oil for cooking or dipping your favorite rustic bread into.  Add a little sea salt and oh boy,
that bread with be gone in no time!

Hope you enjoyed these little ideas to use your rosemary.
There are so many other ideas you can try out, these ones are fairly easy and fun to add a new little flavor to your day!
Happy weekend! 
Wednesday, June 7, 2023

Yay! You're Here!


Happy wednesday!
It's going to be a hot one here today, most likely
90!  Which is very warm for the PNW.
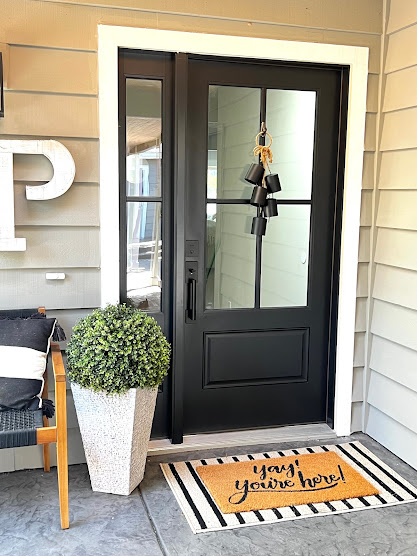
I thought I would share my front door finally.
It was done a while ago I just forgot to share it with you. 
I searched for months using the measurements of my existing door
only to find out each vendor couldn't do what I was looking for. 


Yay!  You're here!
Super cute mat I found at Target to welcome all who come to visit. 


Back to the door,  I ended up heading to Home Depot
to the custom millwork department and spoke with someone who could help me find what I was envisioning.  
They did an amazing job helping me create what I had been searching for.
I chose not to have the windows tinted at the last minute, but once the door was installed it has a thermal tint to the windows almost reflective like a mirror.
I decided that if I didn't like the glass clear that I could always
buy some of the window privacy film.  
For now I like it clear. 


If your interested,  I ordered the Therma Tru custom
door with the left side light with 2 panels.
You pick the color of your door so it comes already painted.
I chose the black hardware which I also purchased at Home Depot.


The black bells are hanging from the door with a command
hook.  I found the bells at HomeGoods. 
So happy to finally have my door in after two years or searching and waiting for the right fit.