Monday, November 30, 2020

Diy Frame


Hello and happy monday!
What is this you ask?
These little frame pictures are at the Dollar Tree,
what was cats raised on the picture there I ripped
them off so I could turn this picture into a christmas
wood picture.
The frames come with all kinds of silly images on them,
just look in the frame department for them. 


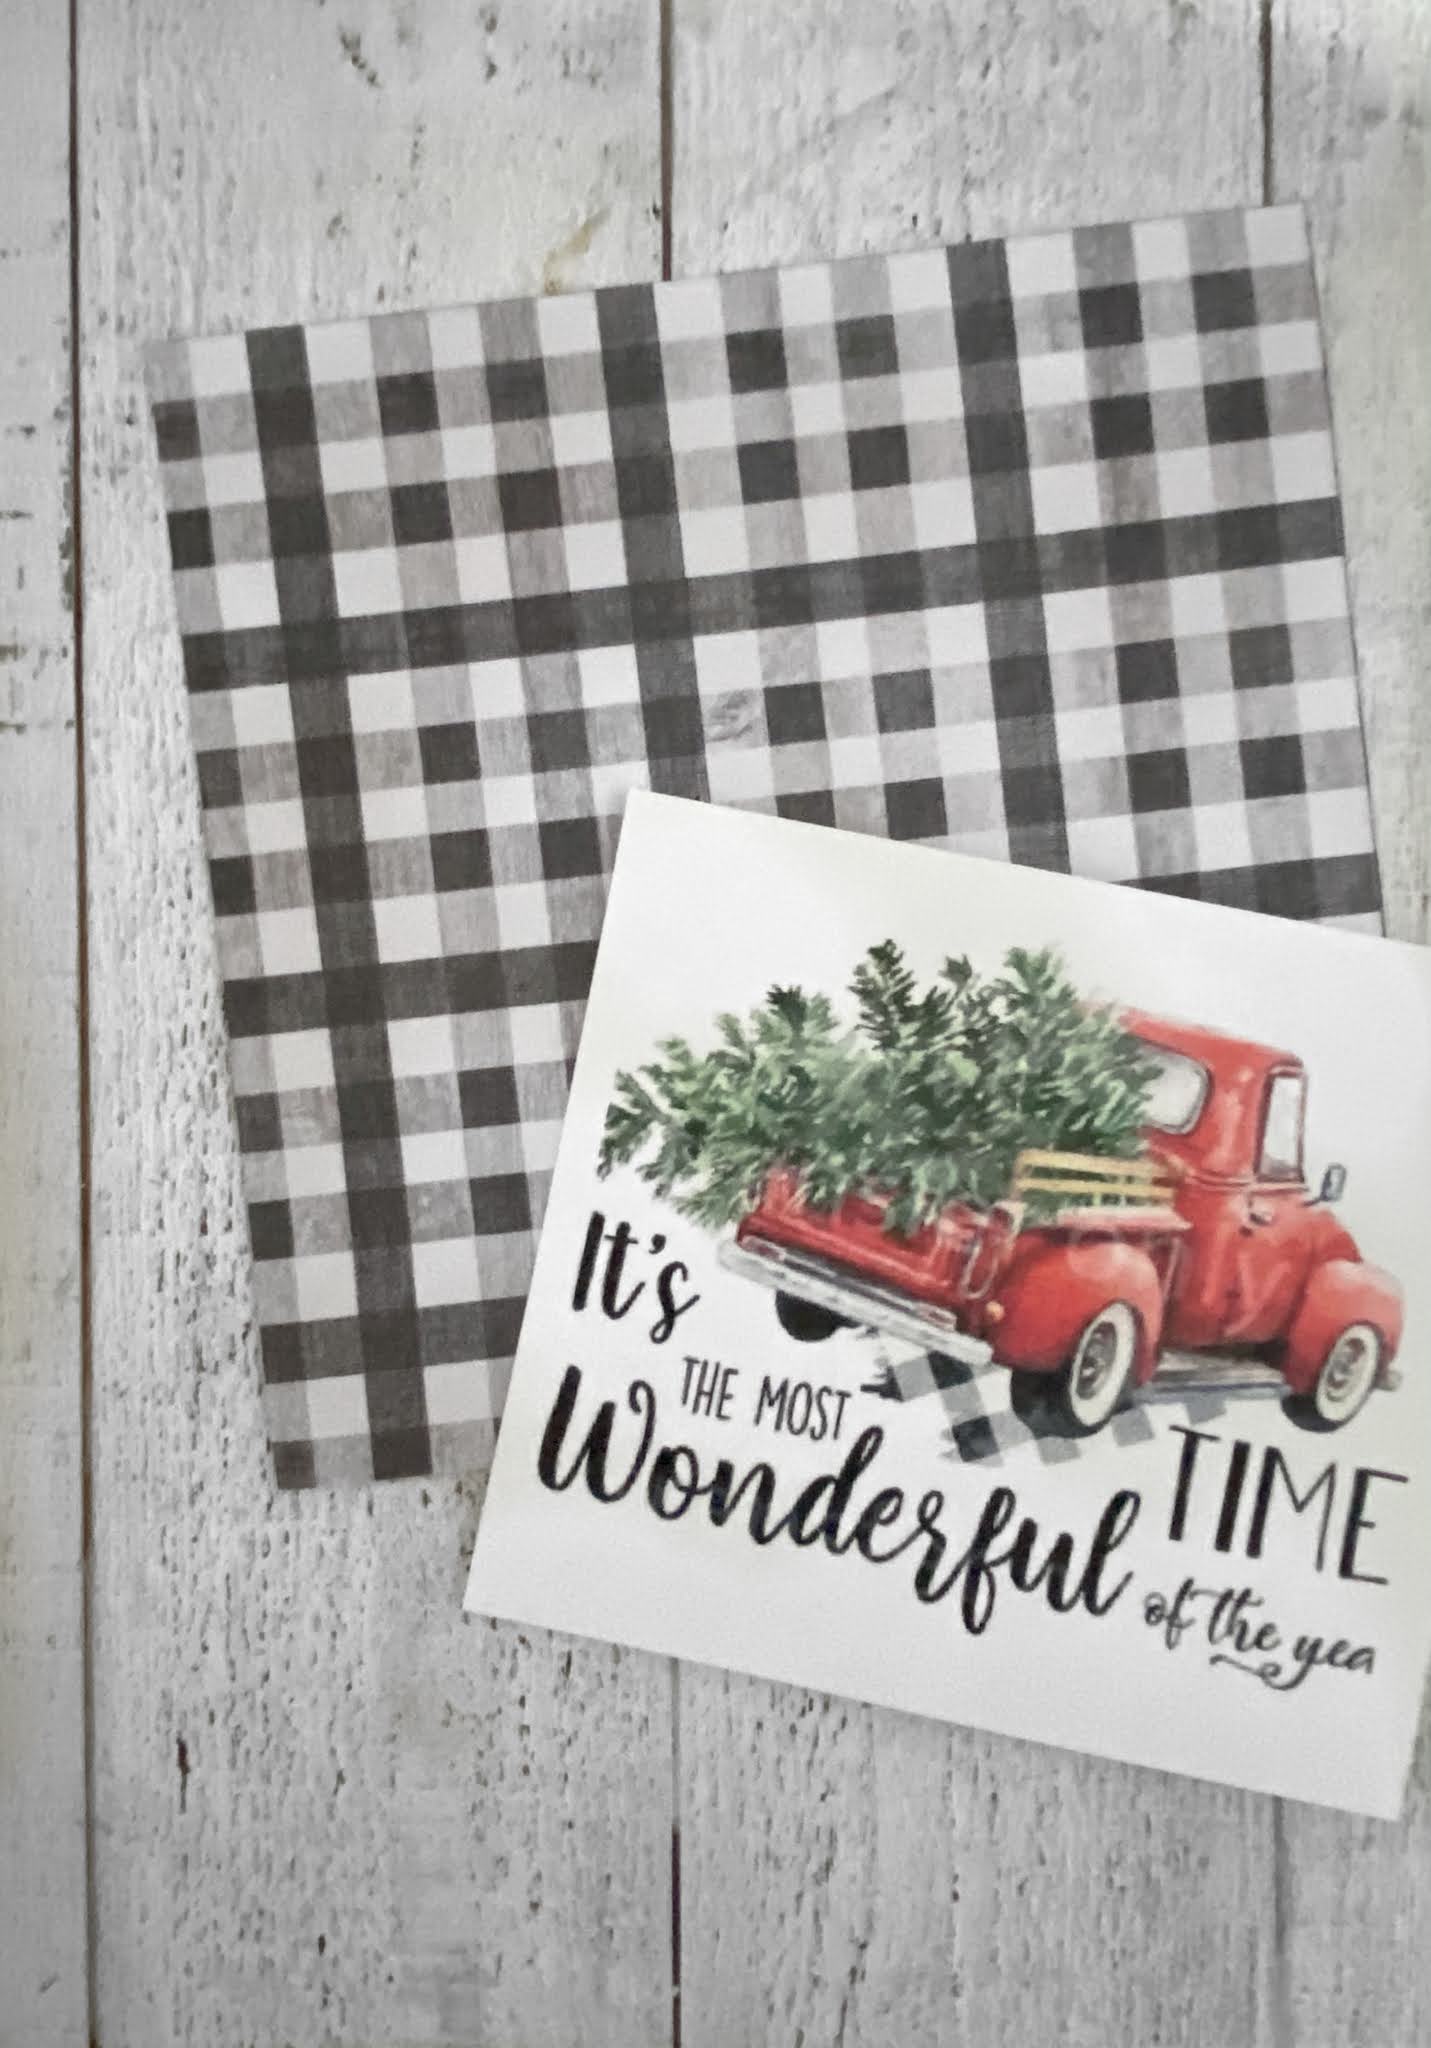
I cut some black and white buffalo plaid scrapbook paper
sized to fit the frame and glued it down.
I have showed you this idea before, but the image 
is from googling red Christmas truck.  Once you do this 
you can find free printable images.
When you find one you like use a heavier cardstock to print it out on.
Here's the one I chose.
Glue it right on top of your background piece of paper. 


Turned out so good!
I believe the frame is measured at 8 x 8"


Time to add it to my Christmas decor!
These make great homemade gifts to give as
well as add to your holiday decor. 


Saturday, November 28, 2020

Shae Rose co.


Hi friends!
So excited to be sharing my youngest daughter Shae's new
venture!
She has opened a shop called ShaeRose.co
You can see her all cotton canvas bag designs below.
So proud of her for working hard to make these designs
and saying yes to starting something new!
Go Shae!

Go take a look at her site 


Thursday, November 26, 2020

Happy Thanksgiving


Happy Thanksgiving dear friends!

With Thanksgiving scaled down and family near and far that we won't see, we all have so much to be thankful for.  
It's easy to get swept away with the thoughts of ALL the traditions and normalcy of the holidays being taken away,
 but we need to get creative. 
Our holidays now will look different, but that doesn't mean we can't find new ways to celebrate. 
I hope you are able to embrace today for the gratitude it serves, finding as many things you can be thankful for...... one for me is life, another day here with those I love and those that pour into me daily.

I love this;
"The thankful heart opens our eyes to a multitude of blessings that continually surround us." -  James E. Faust

On a funny note-  
For those of you who cannot be with family this Thanksgiving, please resist the urge to brag about it!!     
We all need to laugh!


And with that being said,
we will have just the 4 of us this year, scaled back
from the typical 20 something....
So I decided to make these mini pies and mini crisps.


The recipes are for pumpkin pie, apple pie and 
mini cranberry apple crisp.  
These little cuties are sooo small, they look bigger
in the picture due to the angle I shot them at, 
but they are 3" pies!  
The recipes made 7 of each


Each were easy to make and went quickly as I cheated a bit
in using store bought pie crust.  I ended up using 3 pie crusts
for the 14 mini pies. 
 The crisps of course don't need a crust, just crumble on top.
They turned out so good! 
(we may have sampled some last night)

Happy Thanksgiving!
Give thanks for a little, 
you will find a lot!


Sunday, November 22, 2020

DIY Mini Yarn Hats


Who is ready for an adorable Christmas craft?!
I made these little mini yarn hats with a small portion
of a toilet paper roll and some yarn.
At first I was going to just add an ornament hook to the
little cutie but decided to make a garland with them instead.


I used some jute and wood beads to make this garland.
I cut 30" of jute and every 6" added a hat and then three beads.
Two 10mm and one 12mm. 


Aren't these adorable?
They really are so easy to make.
You can head over to my 2340 West Newton Instagram
page to see full videos on how to make these. 


Couldn't you see these in so many colors?
I think I will try and find some two toned
Christmas colored yarn.  These would be
cute just hanging on the tree. 


Here's a little teaser on how to make these,
cut at least 45 pieces of 10" yarn.
You also need a roll of toilet paper
and cut a 1/2" for the base of your hat. 


For the rest of how to make this go to my home page and to the right
of the page are all the social incons, click on instagram and
then in the search engine type in 2340 West Newton
you will see the video in my stories on how to make these step by step.
Have fun!!! 


Thursday, November 19, 2020

Braided Pumpkin


Thanksgiving is coming!
I had some more of these orange pumpkins left from Halloween and looked online with what I might be able to do with them.


Start with the pumpkin and remove the stem on top and 
the tag.  I used white chalk paint to cover the orange.
Paint it with two coats of the white. 
This pumpkin is made from a braided mop head refill
from the Dollar tree!
Yep, a mop head.  You just cut the material away from the plastic at the top it's adhered to and there you have all the "yarn" you need to glue to the pumpkin. 


Once it's dry cut a quarter size hole in the top of the pumpkin
Now take the mop head and cut it away from the plastic piece
it's attached to. 
Plug in your heat gun and starting at the bottom add a very small bead
of glue and attach the first strand of twisted braid.  Tuck
the remainder in the top of the pumpkin


This will take some patience as you work around the pumpkin slowly
as you keep adding strands tuck them into the hole in the top.
Once completed push a stem (I found one out in the yard and it was cute at 5" long.)  Push it down into the hole in the top. It will hold all the strands down inside the pumpkin. 


Here it is all done.  Take some jute and tie it around the stem.
Aren't they just adorable!!!


Monday, November 16, 2020

Joy to the World


Good morning!
I've been a little slow in posting my Paper Pumpkin kits.
This is the Joy to the World kit, although I did change it up a bit!


The gold words are so pretty in this kit....


I just glued all three words stacked, there 
is also gold on the cardstock.


For this one I just embossed the tree in gold,
and added the gold sequins and gold joy word.

This kit is so pretty on it's own and has so many pretty 
pieces.  With my creative mind I always like to change
things up!


Saturday, November 14, 2020

Dollar Tree Ornaments


                                                                Happy Saturday!  
I picked up both of the above ornaments at the Dollar Tree, they are really cute in person and the snow flakes have a sugar glaze glitter on them.   It's fun to add some flare to them so here goes.....

I picked up these green wired garland at the Dollar tree too, you get 12 in the package.... I just cut a 1" piece for each of the ornaments. 


These white washed mini pinecones can be found at Hobby Lobby in the Christmas dept.  


For the stars, cut yourself  1" of the green garland 
and wrap it into a circle.  Hot glue it to the front of the star and then take two of the mini pine cones and glue them on top of the garland.
That is it!! You can do this!
I added some mini bells to the center in both silver and red. 


For the camper you do just the same.
How cute do they look!
It adds just a little sumthin sumthin to them!


Here's how the top looks, 
so cute! 
And if you didn't figure it out,
you get two for a $1!!


Thursday, November 12, 2020

Diy wheat arrangement


Hi all!
Coming at you again with another easy fall/thanksgiving
diy for you to try.


Start with a vase, dried wheat bouquet and floral foam brick. 
I had this white vase on hand already so you can use any
vase that you like.
The wheat bouquet can be found at Trader Joe's for $2.99.
Get yourself some spanish moss and some floral foam bricks
and cut it to fit inside your vase.
Once you have it cut add just a little bit of hot glue and attach it to the inside of the vase.


Starting in the center of the vase start sticking your
wheat piece into the foam and continue until it's all used up.
Add some spanish moss around the sides to fill up any open space.
That's all there is to it!
If you finish and decide you don't like where you have 
placed the wheat in the vase, just take them out and replace and redo them. 


Looks pretty cute next to the galvanized print I showed
you last week.  


Tuesday, November 10, 2020

Mini Coffee Cups


Good morning!
These little cute cups are in my Etsy shop and I thought
it would be fun to show you a few ways my customers
are using them.
It's been amazing to see the creative things they are being used for.


You can order one or order as many as you need as
well as choose your straw colors


I started making these for group parties I hosted as well as my team at my church.  Everyone just loved receiving them.  When I make mine
I typically fill them with hershey kisses and sometimes add a coffee card if it's for a gift.
Well take a look at a few ways my customers are using them.....
Get ready for some cute factor!!!


                                                                 Newborn photo shoots!


Kid's playrooms.... see them sitting on the ledge there?


More baby photo shoots!
Look at that mini apple computer!


Who knew there is such of a thing as
Puppacino parties!!!
I cannot tell you how much I love seeing all these pictures that are sent to me.  There are so many more too.....
I hope this post made you smile today!