Showing posts with label Home Decor. Show all posts

Friday, January 13, 2023

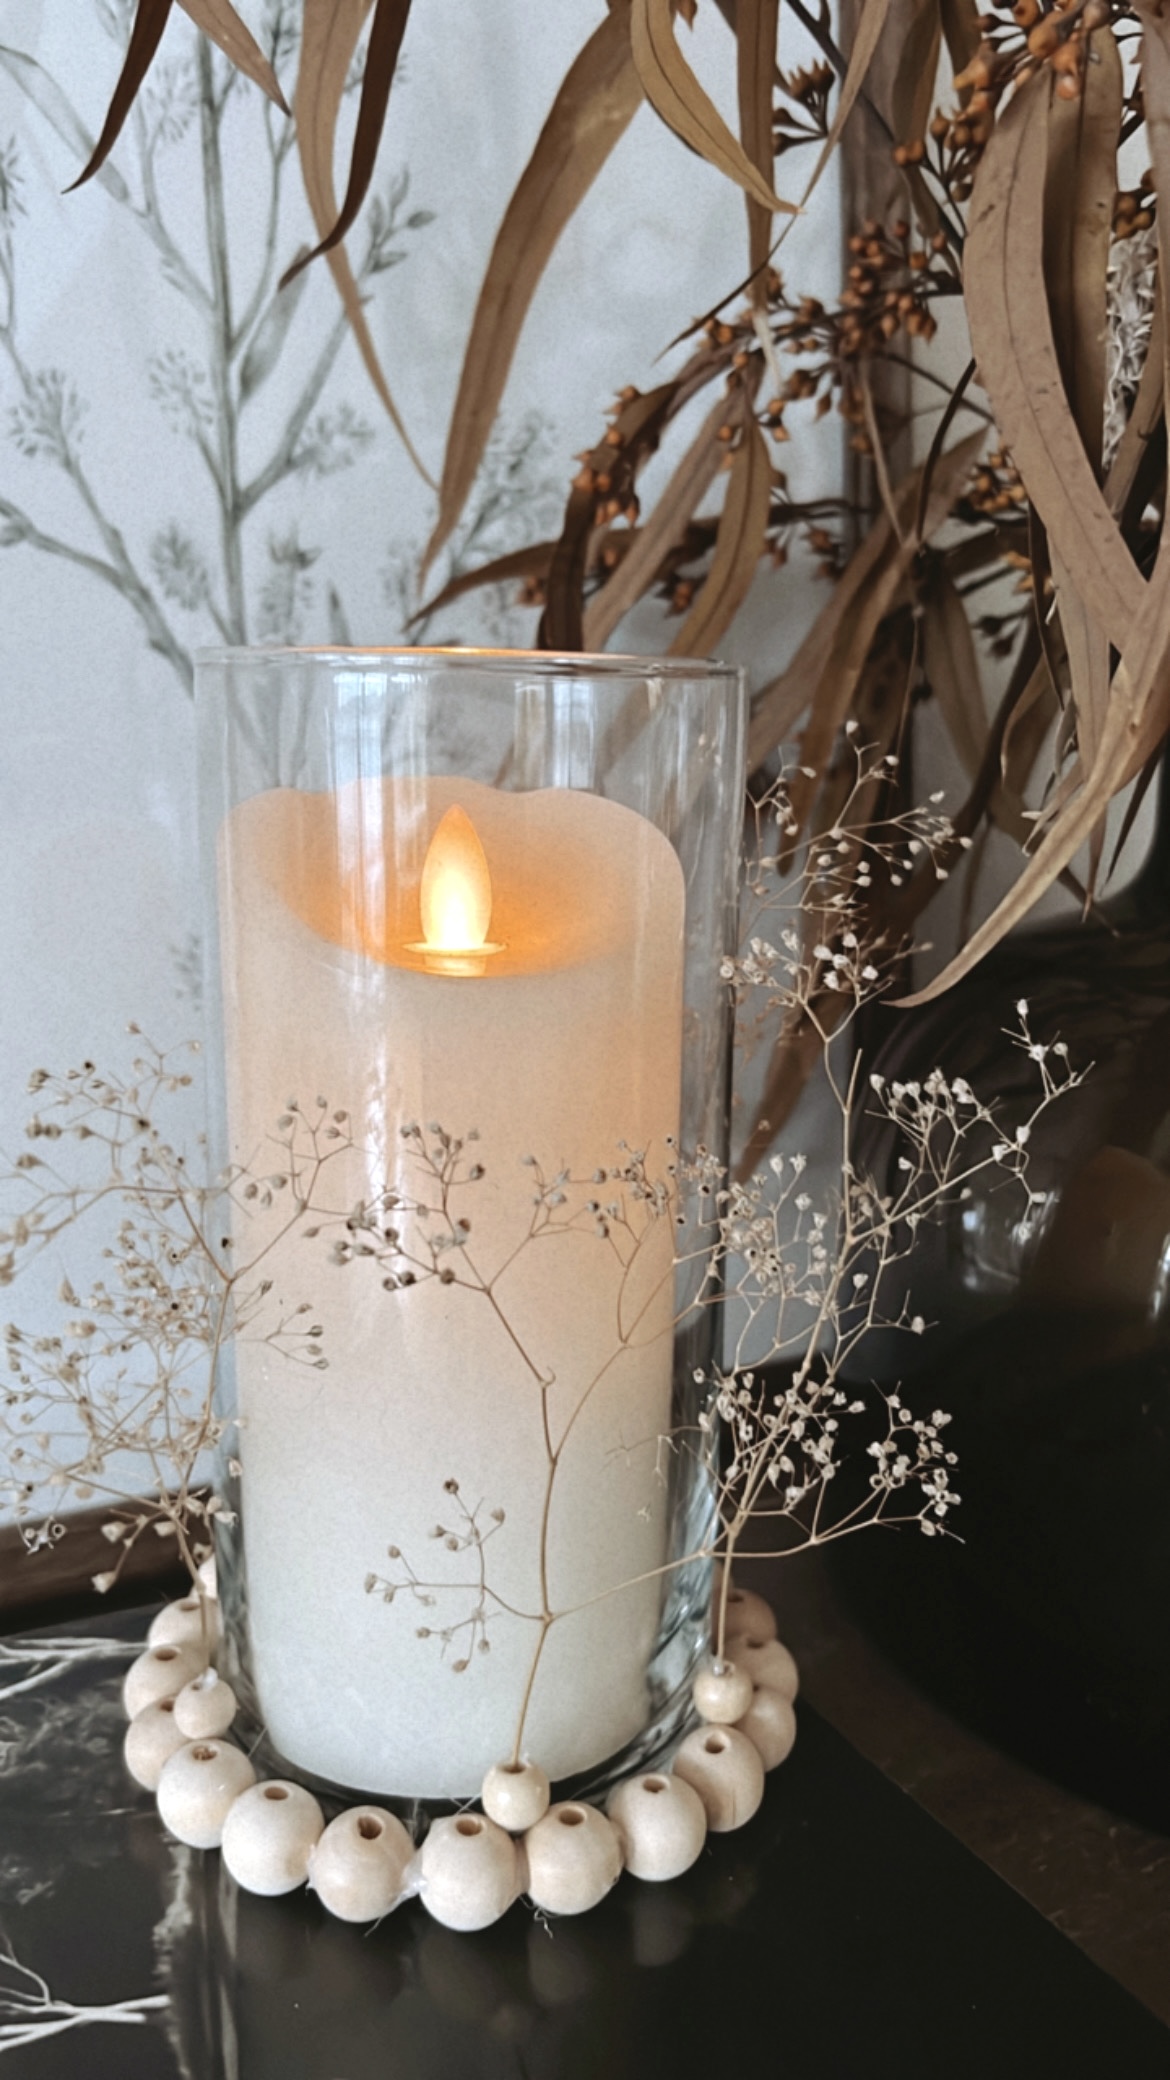
Boho candle


Happy friday!
I am always on the look out for new trending
wedding ideas for the decor.
This one can be used as home decor or for luncheons or
weddings or..... you get the idea!
You start with purchasing some of the glass cylinder
vases at the Dollar Tree and some 16mm wood beads.
I had some baby's breath dried on hand, you could use fresh or any dried flower or greens. 
You will also need some glue,  I show you in this picture 
E6000 glue but once I got going I switched over to a hot
glue gun.  It dried must faster and was easier to work with.


Just start by gluing each bead around the base of the vase.


Keep going.....


Once you finish now add just a few small beads (10mm)
around the vase on top of the 16mm ones. 


You can see how I just added about 6 total around the vase. 


Once done, add just a bit of hot glue to the ends of the 
baby's breath and tuck it into the small bead.
Fill each little bead all the way around.
The dried flowers lay nicely right up against
the glass vase.  So pretty!
Now add a battery operated candle and there you have it!!


What do you think? 


Friday, April 1, 2022

Easter Bunny Canvas


How cute is this moss bunny canvas!
Circling this one back around from 3 years ago because it's so cute and if you missed it, well then,  you'll want to see it!


I always try and show you projects that are quick and easy
and affordable.
This one requires a canvas and some moss from your local craft store.  I found mine at Hobby Lobby


I used an 8 x 10" canvas.  I was able to find 10 canvases
in a package at Michael's for $12.  Such a good price.
I found the bunny by googling line art bunny, 
I printed it out and cut it out.
The moss can be found in a sheet at the Dollar Tree or since
I needed quite a bit for my class I found a large 48" package
at Hobby Lobby for $10.00


Trace your bunny on the back side of the moss and cut out.


Super easy to work with and cuts out nicely.


Once all cut out take out your glue gun and glue it
directly onto the canvas.
It's that easy!!!
So cute!!!


That's it!
Now you can enjoy and find a home for this little cutie.
Happy Easter!

Friday, April 2, 2021

Easter Arrangement


Happy Good Friday!

Today I have been getting Easter ready over here.
No big family get together this year, just three of us.
But that doesn't mean we can't set our tables up!
Wanted to put together a quick and easy Easter arrangement for to you make


I love to bring the outdoors in.  I found this rhododendron in my yard, yet I have no idea what type it is.
  I love the lacy looking little buds on it, and I always share with you,
use what you have!  Look in your yard!


I added white hydrangeas, bear grass and the
rhodie type plant I found to the vase and surrounded
it with these cute glass eggs I found at Homegoods.


I'm loving the simplicity of this and how easy it was to 
put together.   
Take a walk through your yard and see what you might have
that you can use to creative a pretty arrangement in your home
Wishing you all a blessed Easter sunday!


Tuesday, May 5, 2020

Floral Arrangement


Hi friends~
Sharing this gorgeous dogwood arrangement I put together
for my Aunt's birthday yesterday.
I simply went out and cut a few branches that would fit 
the size of the vase.
But what I really want to share with you is that you can do and use
this idea with any type of flower you have.
Do you have hostas in your yard?
Well if you do,  here's the little pretty trick I have 
for you.


Using any vase you have, before you fill it with 
water, line the sides with the Hostas leaves.
I usually use three, but if you have an even bigger 
vase add another leaf.
I also use them in the bouquet.
This is so pretty and so much fun to gift someone 
especially with Mother's Day this weekend.
I hope you'll give this a try!

Wednesday, August 7, 2019

Home Decor


Are you ready to add some fun and or color to your home decor?
Look how adding these beads to your decor can give it that little pop!


You can easily nestle them in your pieces or wrap them around a curtain, hang them from a door knob, wrap them around a glass vase or plant.  So many options!


I offer them in colors too!
So if there is a specific color you would like custom order it!
I am so excited to be releasing some new options Sept 1st so stay turned for some fall fun! 
If you would like to order any of the beads go 
HERE to view options available

Saturday, June 8, 2019

Rubbermaid Cabinet


Happy weekend everyone!
We have been working on a few projects over here today.
One was hanging one of those 8ft. steel ceiling racks in our garage to make more organizational space for boxes and things since we moved in. 
The other was this project I took on.
I was looking for a cabinet or chest to put outside and found 
this gem at Home Depot by Rubbermaid.


Now,  I personally am one that does not enjoy taking the time
to put something like this together, but I tell you, it was super easy and didn't test my patience at all. 
I purchased mine for $149.00


The size of this cabinet is generous it runs 
46" x 24" x 37.50 with a shelve inside that holds
up to 50lbs in weight. 


Seriously, look at this piece! It really looks like it is a piece of furuniture, but it's plastic!
Even the handles are real handles and the doors have a snap feature so that when you close it you can put a lock on it or not.


This was the space I was visualizing for it to go and it fits beautifully.


Loving the look and space that it fills. 
It will be handy when I am hosting outside.
Right now I filled it up with beach towels and our
life jackets all on one shelf with plenty of room for other things that could be stored there. 
Enjoy your weekend friends!

Monday, June 3, 2019

Large Paper Flowers


Grad season, baby showers, bridal showers, they all are coming right up and we are getting ready to host over here.
We haven't been in our new home but 6 months and the yard is just starting to pop with color. 
Above is this trellis wall with a evergreen plant that I don't know what it is called yet.  But what I do know is it's ready to be decorated for some parties!


I have showed these large paper flowers on my blog before
just not done in white. 
You can head over to my instagram accout by 
clicking the icon to the left to see how to make these


You can see how big they are by the scale of my hand


I made the middle of each flower different


Here are the original large paper flowers I made below
Doesn't matter if they are white or different colors,
they are just beautiful


Tuesday, May 14, 2019

DIY Photo Hoop


DIY Photo hoop project........


Next month my daughter graduates from High School, 
I wanted to make some decor for her grad party.
Above are a few items I purchased from the Dollar Tree to make
this project.   
You will need to get:
a hula hoop
a garland of greens
a bunch of flowers

This project is a great way to showcase the different photos you have from year to year.  It is also a great project for weddings, showers, baby showers or birthday parties so give it a try. 


I chose the hula hoop with the least amount of design
on it so I could easily spray paint it.  I sprayed mine gold.


Once it's dry, take a ribbon of your choice and stagger the ribbon
across the hoop as you see above.  Once you have them where
you would like them, using a hot glue gun, adhere them to the hoop.


The ribbon I used it like a linen cloth type, it's what I have on had.
You can use any color for the event you are hosting.
To attach the photos I used the little wooden clothes pins.
You can find them at your local craft stores, even the Dollar Tree carries them. 


Using the leaf garland, fold it over and cut it in half.
That way you have enough for each side of the hoop.
Wrap it around and glue it down.  


I placed three flowers on each side as you can see.
And here it is all done!
I made two of them to place in my front windows in our
living room so people can walk over and take a peek.
To hang them I ran some twine around the top and used a push pin to push it into this framed window.
Have fun trying these!  


Thursday, May 9, 2019

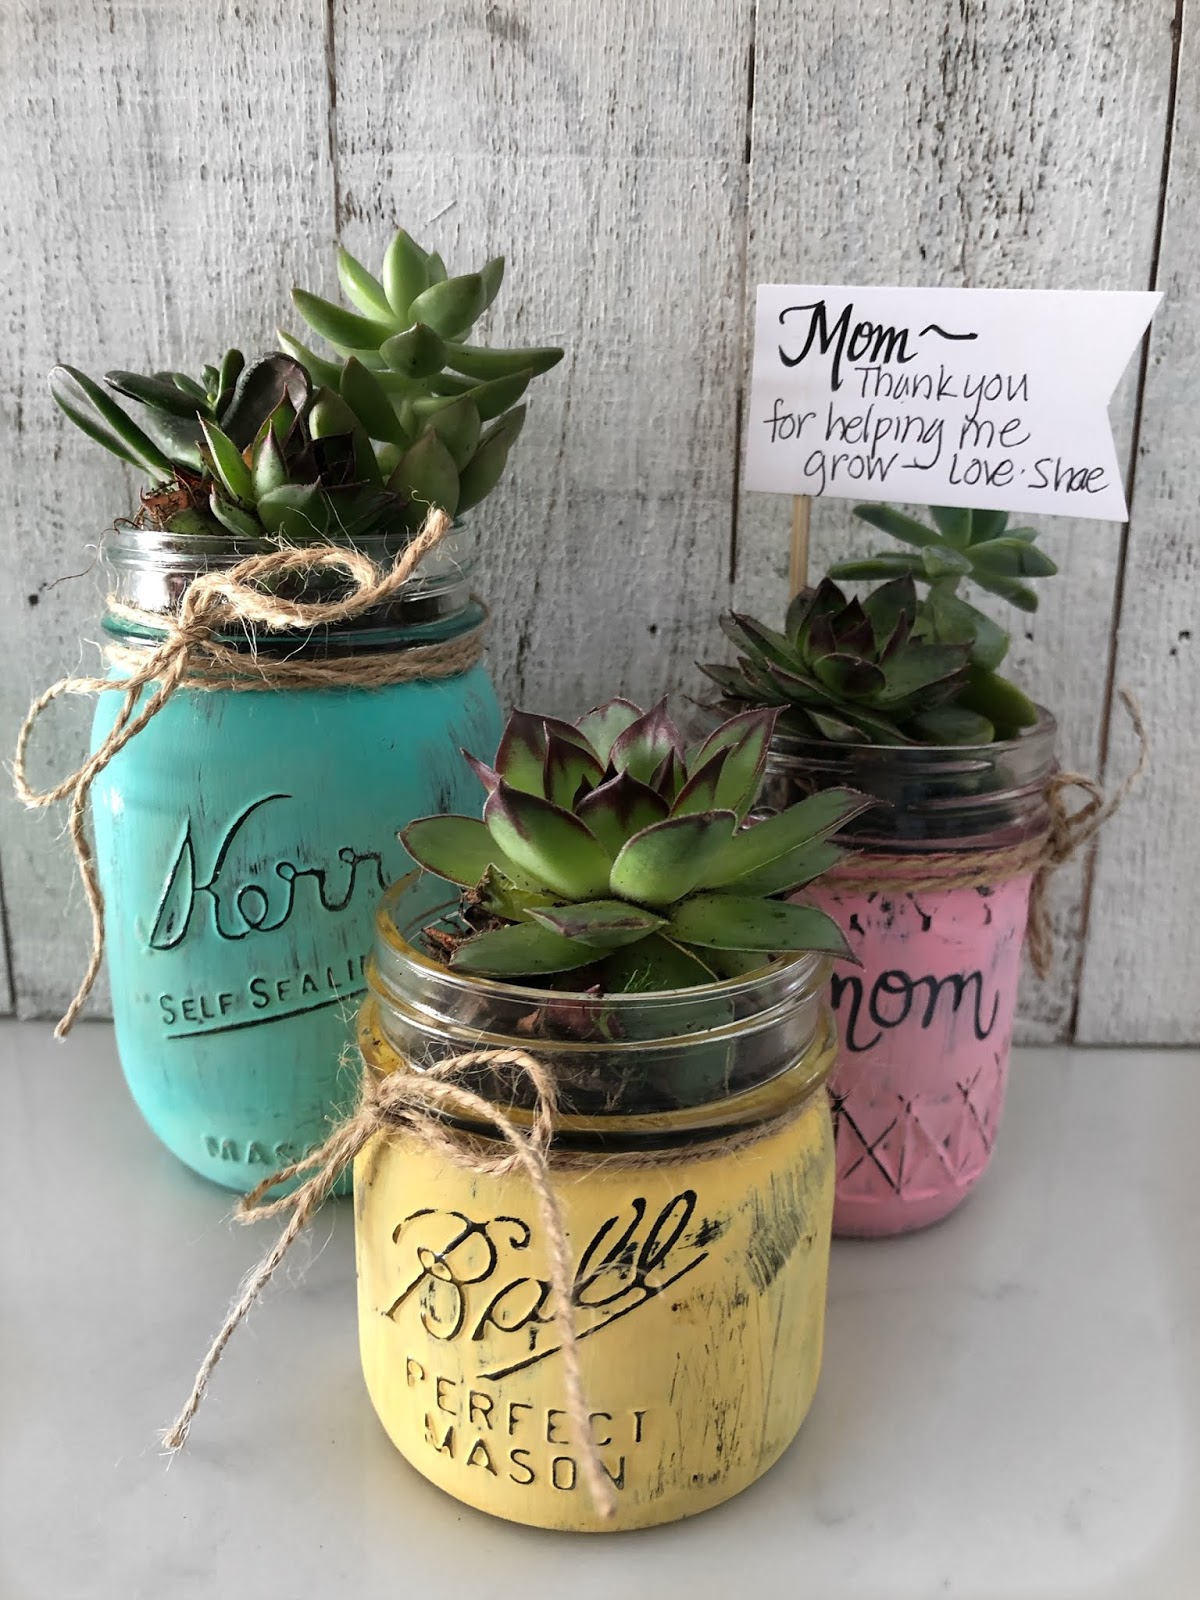
Diy Mother's Day gift


Good Morning!
How about we get started with a diy mother's day project you can do easily with the kids!
Now,  this sounds like your making your own gift doesn't it?
But the idea is for you to make these and give them to any Mom's out there! Plus,  BONUS! they are super cute and easy!


I started with three different sized ball jars.
You can a find them at craft stores, goodwill, value village 
or the grocery store. 
I posted above the paint that I purchased from Michael's,
what's great about using chalk paint is that is dries super quick and 
easy and for the kids that's a plus.
Choose any colors that you might like, I chose spring like colors.


Using a sponge brush lightly paint on two coats, one at a time leaving about 5 mins between each coat.  Once dry I used a little piece of sanding paper to lightly rub off just a little of the paint to give it a distressed look.
If you don't have any potting soil go to the Dollar tree, 
(yes! they have a bag for a dollar!)
You certainly don't need much to fill the ball jars unless you are making quite a few of them.
Fill your jars almost to the top.
Then comes the fun part.


Now,  I have chicks and hens growing right in my yard so I love to head out there and use what I have.  If you don't have succulents in the yard then head to your nearest grocery store, or gardening center.  They will have plenty to pick from.
I was able to fit 3 small succulents in one jar, so see what you can do with the size you have.

I hope you will give these a try!
And if you are a Mom out there, Happy Mother's Day to you!
Enjoy your day friends!