Wednesday, August 30, 2023

Shop bags


Good morning!
I have a few of these amazing canvas bags available in my shop
right now.  
Made by my sweet daughter ready for you to enjoy!


Each design comes in either black or white cotton canvas
and can be used in so many ways.
I ended up getting a big bouquet of flowers that I wrapped 
in brown packaging wrap then put inside of the bag to gift someone.


They are made of a thick, heavy washable cotton that
won't fade. and are a 24" x 18" bag. 


Which one speaks to you?


This one  means "loves loose" 
I have a few of each so be sure to check them out before they are gone!
Thanks for taking a peek!

Monday, August 28, 2023

Bag of Bones


One more week friends and you can order from the new mini catalog! 
This fun new set is called "Bag of Bones"
It is also offered at a Bundle called:
Them Bones Suite collection which includes the following....

  • Them Bones Suite Collection – 162222 – p. 48-49 – $78.75
    • Bag of Bones Bundle – 162219 – p. 49 – $51.25
      • Bag of Bones Stamp Set – 162216 – p. 49 – $20.00
      • Bag of Bones Dies – 162218 – p. 49 – $37.00
    • Glow-in-the-Dark Bats & Ghosts – 162220 – p. 49 – $8.00
    • Glow-in-the-Dark 6×6 Specialty Designer Series Paper – 162221 – p. 49 – $7.00
    • Them Bones Designer Series Paper – 162215 – p. 49 – $12.50
You can order the Suite itself or order what items you'd prefer separately. 

This is such a cute set, you can dress up the skeleton with a beret, a moustache, cowboy boots a hat and much more! Don't forget about the cute cat and dog too.  
Also available is glow in the dark paper to add a little pop to your cards.  So much spooky fun! 
I found a pumpkin stamp from one of my retired Paper Pumpkins to pop on top of this skellie's hand. 


I can't wait to get to show you the mini catalog and all the fall fun,
spooky Halloween, and holiday magic for you to start to create with. 
It will be available Sept 6th so stay tuned!

Saturday, August 26, 2023

Caffeine Queen


It may seem a bit premature, but since I am seeing
Halloween in ALL the stores.  
I thought it would be time to post this new Halloween
cup going in the shop just in time for all the 
Fall/Halloween season. 


Here it is up close,  has a little witch in the center.
Mini Starbucks - HERE


These little cups are great for favors for kids parties, give them to friends or co-workers filled with treats. 
The ideas are endless!
Below are the two different cups already in the shop.
So if you love Dunkin Donuts or Starbuck's these are for you. 


Thursday, August 24, 2023

Fragrant Forest


Feast your eyes on this beauty!
Hello and welcome back to some sneak peek's from the upcoming catalog.  This stamp is a large background stamp with gorgeous trees that almost look like a photograph.  


Here are the two stamp sets I have used.  Both are new and coming to a theatre near you on Sept 1st!  hahhaa!


I used the new stamp pad color called Wild Wheat for the trees,
it almost looks like our Old Olive color.  I used the ivory cardstock
as the background paper.  Isn't the ribbon pretty?
I found it on Amazon
It comes in many colors and you get 20 yards for the price. 
I love to use it for fall and holiday tables as well as for Christmas.


Tuesday, August 22, 2023

Magical Meadows


Happy tuesday!
It's been a revolving door over here at our home with lots of visitors
since the beginning of July.  
My sister and her friend were just here for the weekend.
We had a whirlwind of a time walking, playing pickle ball,
paddle boarding, wine tasting.  You name it we hit the ground running!
Fun filled weekend!


Today I am back sharing the gorgeous new Magical Meadows
designer paper that I shared a few days ago.
It is a new designer paper in the mini catalog which will go live
Sept 1st. The red berries with the green is so pretty. 


The greeting I used is from another new set called 
"So Sincere"  another new set coming Sept. 1st. 


To create this corner of the card, just roll
up the side and adhere with some adhesive. 


Very simple card for you to try and then get excited
about the new mini catalog which will be available come sept.  

Saturday, August 19, 2023

Magical Meadows


Good morning!
Sharing with you today some of our new product coming out in the new mini catalog.  This one is called Magical Meadows, it's a 12 x 12 
double sided designer paper. 
Gorgeous!


I personally think this paper can be used anytime of the seasons,
but this one is suppose to be for winter, but I think it can used
anytime.  I stamped and cut out the blueberries and added them
to the front of the salutation. 


These products will be available to you Sept 1st
when the new mini catalog rolls out.
Stay tuned! 


Thursday, August 17, 2023

We have an engagement!


Squealing with delight!
We have an engagement over here!
My youngest daughter was proposed to this past
weekend and we couldn't be more excited!


The balloon arch wall was made for them! 


We had these cute sugar cookies made for them
with their initials and a ring.  Did I say delish?


This was right after Nathan proposed, 
the photographers told them their families
were looking on.  Those smiles! 


A few more pics of their sweet love!


We all gathered around them and prayed over their engagement.


Happy Mama and my sweet girl.


We had a quick champagne toast and snacks
to bless and celebrate the newly engaged.


Monday, August 14, 2023

Balloon wall arch


Happy monday!
Have you ever wanted to or wondered how to make one of those balloon arch boards?
We let me show you a quick diy idea that is affordable and NOT 
intimidating at all and the fraction of the cost. 
Above in the picture I purchased from Home Depot this foam core board that measures 8ft x 4ft x 1 inches.  The cost $15.74
On both sides it is covered with a thin layer of protective coating that peels right off to reveal all white on both sides.
If you were looking for a color board I would suggest spray painting the board.  I did not as I needed mine white. 


Now for the balloons.  You can get some ready great and easy kits off Amazon that are inexpensive, just be sure they are a good quality of latex.  I linked mine here.  I even filled up all my balloons the day ahead and not one popped or clouded (lost it's sheen to them)
You get what you see above, four different sizes and SO many.
I think I only used half of mine.

Today get started lay out all your balloons by sizes.  Then determine how big you want your balloon arch, I just needed mine along the side of the board.  
To fill them I used our air compressor, if you do not have one they also have little air machines on Amazon you can purchase to fill them.
It goes so much quicker than the old fashion way of blowing them up.

Balloons -  Here  


Once you have them all blown up take the clear strip and tape it to something as high as where you will be attaching the balloon arch to.
Starting with your large balloons start to attach them to the clear stripping.   The clear stripping has hoes all the way down it for you to feed your balloon ends into.  I am telling you, it is very easy.
Then step back and start to add the medium size balloons next and so on.   The great things about Amazon's listing is that is comes with a step by step video so you can't go wrong. 


Here is mine just after I finished.  Barely used all the balloons and remember my wall is 7 ft high once I cut the arch at the top. 
I used clear strapping tape to attached the clear balloon stripping to the wall and we had wind when we used it and it stayed in place thankfully! 


Before permanently attaching the balloon arch to the board peel back both side film that cover the board for protection. 
Use a Cricut or Shilouette to create what the board will read.
It's done with vinyl transfer so you can easier transfer it to your wall. 

It's peel and stick time!


There you have it!
All done and ready for some guests!


Saturday, August 12, 2023

Paint and Sip night


Happy saturday!
This was a fun filled time planning and hosting a paint and sip for
my daughters' and their friends.  
We planned the night by having everyone bring an idea
for them to paint or they could use the ideas we had for them.


I was able to find the canvas's at Ross, 6 for $7.99 and
the the easel's on Amazon. 


I always love to have a take away gift for everyone.
I was able to find this amazing set of 12 vintage looking
bud vases on Amazon that I filled with dahlia's for each gal. 


I used dahlia's and white phlox and sedum in the little bud vases. 


I attached to each vase a little message of encouragement. 


We had each guest bring a bottle of wine that I put into
brown paper bags with numbers on them so we could sip and 
guess what each wines were.  We also had a gift for the guest who's wine won the favorite tasting. 


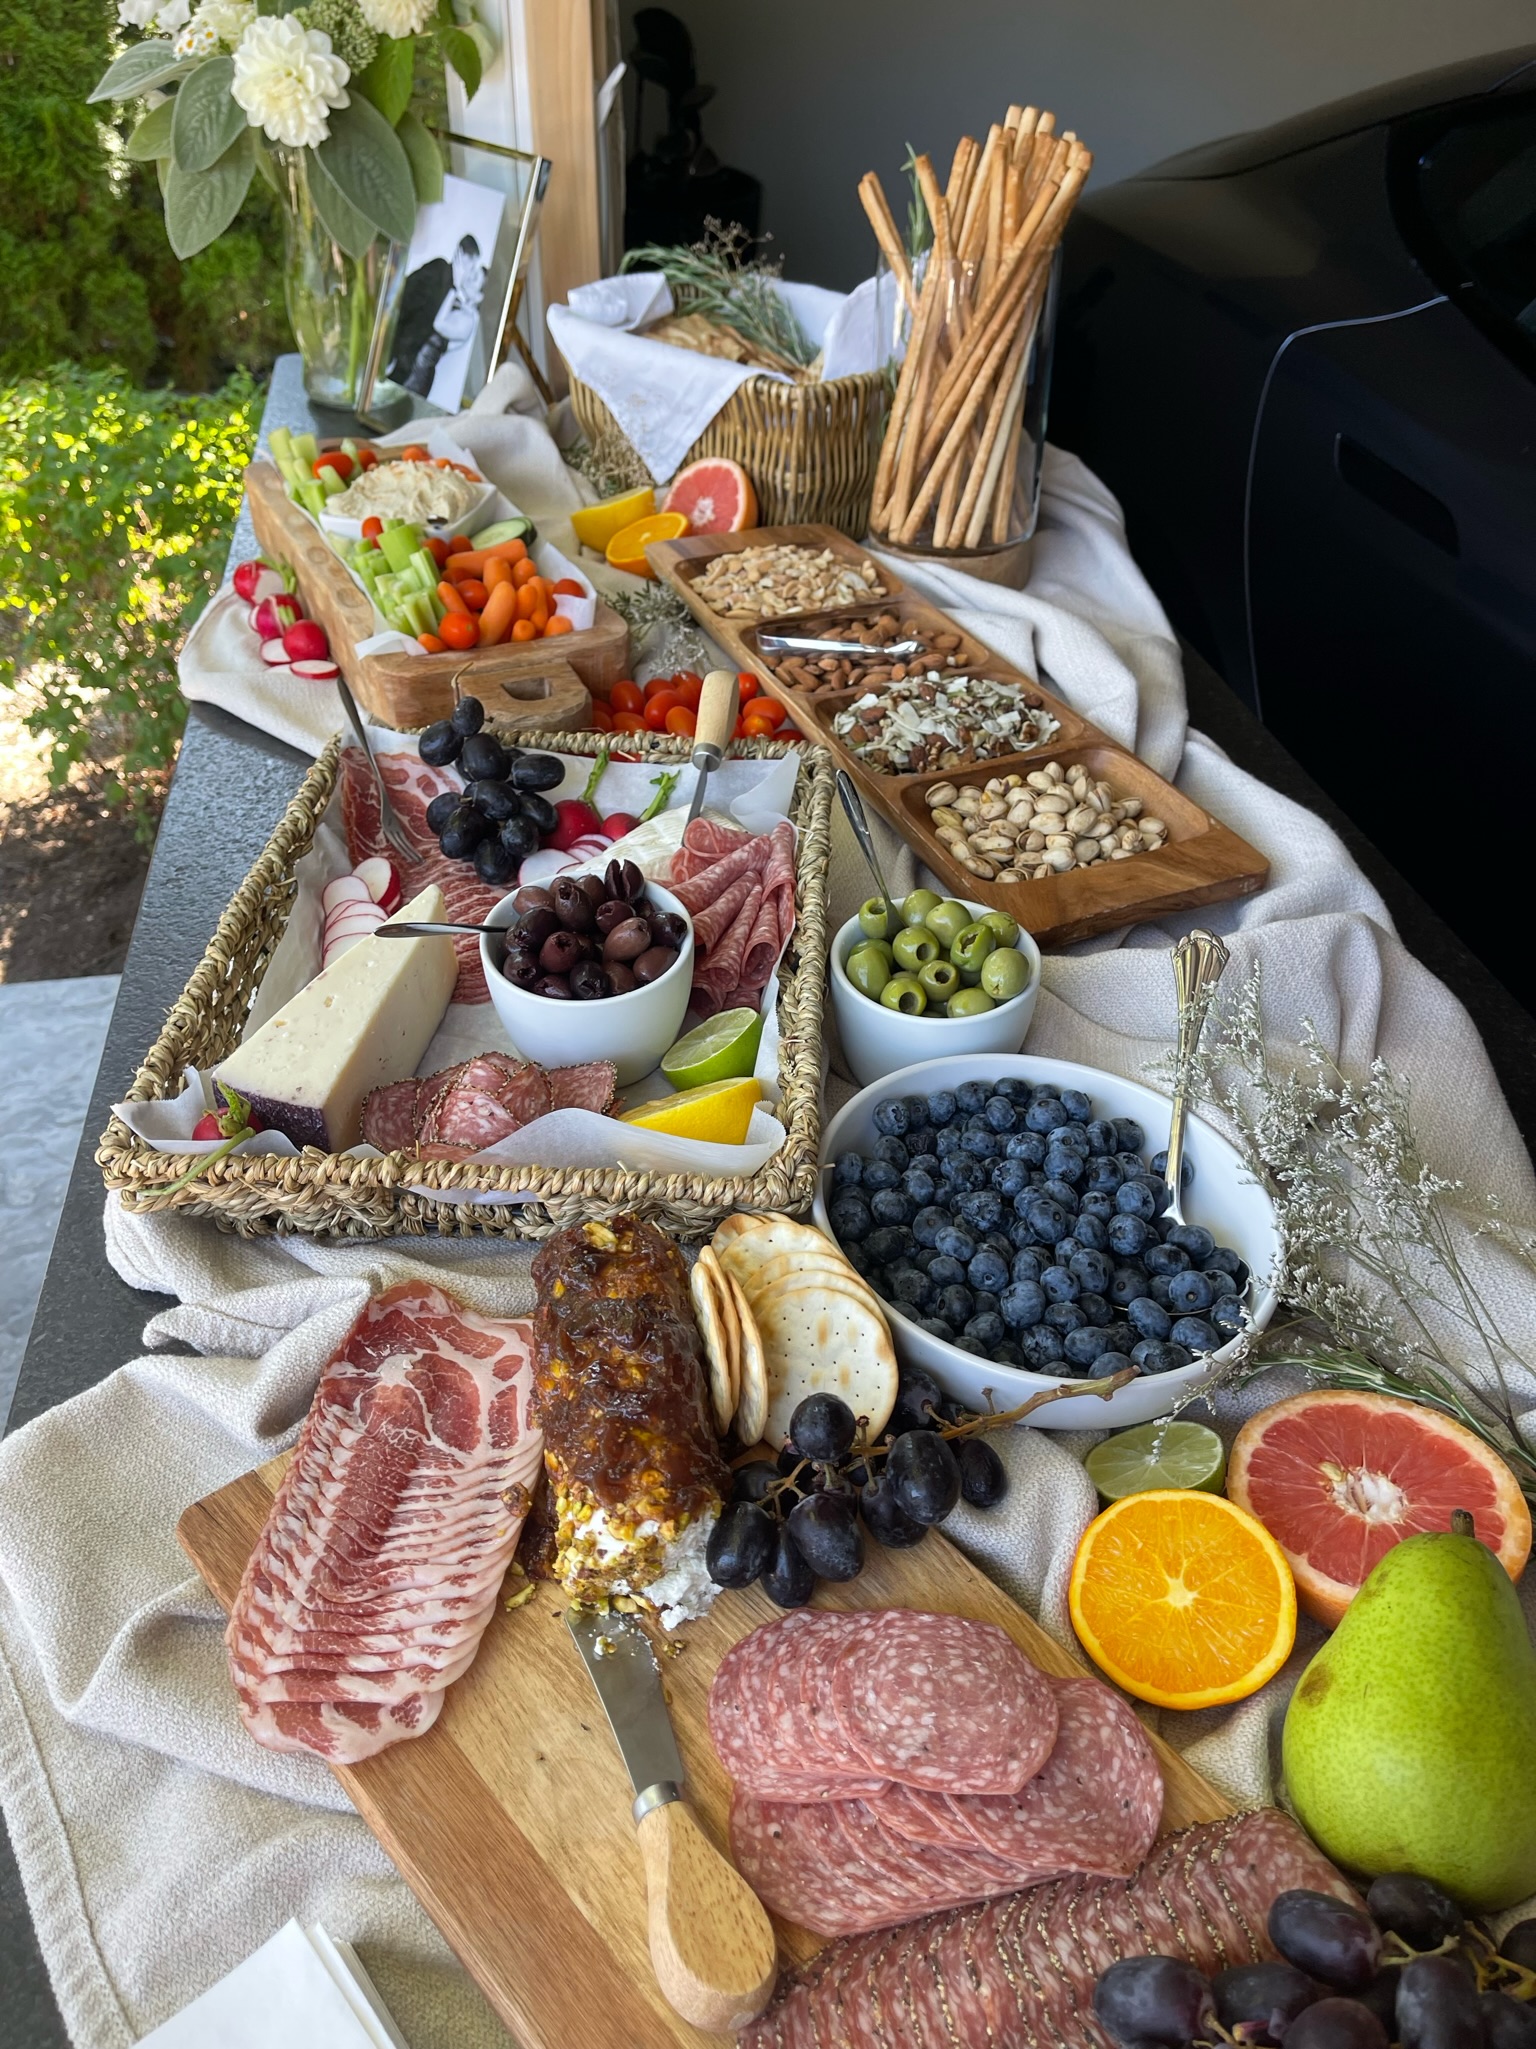
It's always good to have a little food for your guests,
We set up some charcuterie boards with meats, cheese,
desserts and nuts so that our guests could graze and paint. 


Look at the smiles!
I was amazed to see how quickly everyone settled into
their paintings and became soooo quiet and focused working away on their pictures. 


I put mason jars out with many types of paint brushes, paper plates for them to put their paint onto to use like a color palette. 
Also be sure to have paper towels and baby wipes on hand for your
guests to use.  We also had plastic cups with water for them to
clean their brushes with.  


More smiles and look at some of their creations. 


I can't tell you how much fun we all had and truly this
was a fun way to get everyone together to get create and visit!
It's a must try!