Saturday, February 29, 2020

Bunny Bums!


I am sure you have seen me post these before,
but they are back due to popularity and as always
so easy to make.
Start off by buying a bag of the Dove coconut eggs


Using two sizes of oval punches, one large
and one small punch out one large one for the 
bunny body and two small ovals for ears.


Then get some small white pom poms, 
I used some glue dots to attach the pom poms.


These are the cutest and easiest little treats 
you could make.
And of course,  I know you will find some sweet friends
to gift them to!


Cute little bunny bums!


Just in time for Easter!

Thursday, February 27, 2020

St. Paddy's day treats


It's always fun to have some little treats on hand
to give co-workers, friends, women's groups, kiddos.
I made these little chocolate nugget candy treats for
upcoming St. Paddy's day.
They are cut at 1 1/2" x 5 1/4" 


To create the shamrocks I used a very small heart punch
I stamped three times to make the clover. 


I topped them off with a gold sequin and silver rhinestone and 
some gold laced twine. 
Come on now!  You can make these!

Tuesday, February 25, 2020

Spring is coming!


Spring is just around the corner and it always means for me
spring cleaning and sprucing up the house.
I love to take time to move things around and change up 
the decor. Time to bring out the spring things!
I've been busy restocking my inventory for my Etsy shop


The wood beads I make come in a natural wood bead
as well as custom colors. 
You can choose any color or combo color you would like
me to make for you. 
When you visit my shop you will see the custom bead listing, 
that is where you get to create your strand!
You can also add a charm.   As you see in the picture above
there are two sizes, I actually have another size as well listed
that is a bit larger that can be hung from your door knobs or dresser knobs. 


These are just a few custom colors I have made...
The color wheel is the limit!


I love these succulents, they scream spring to me and
what a better way to show them off by adding a strand
of wood beads.


While your checking out the wood beads in my shop
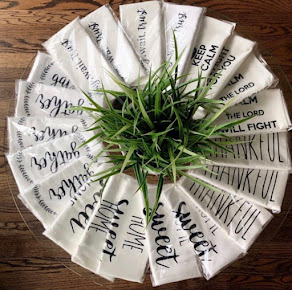
take a look at the new towels that I have created for you,
I promise you will get a good laugh!
Thank you for always stopping by for visit!

Sunday, February 23, 2020

WIT Cellars creative night


Our next WIT Cellars creative night is fast approaching!
Come join the fun as we mix up some St. Patrick's day projects and Easter projects for the evening. 


Here are a few projects we will be
creating
An 8 x 10 bunny moss canvas


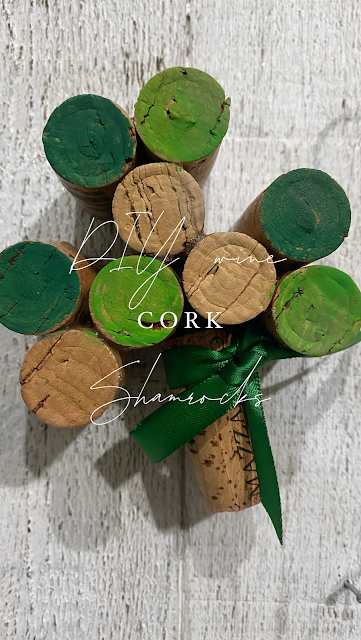
Wine Cork Shamrock


And back by popular demand
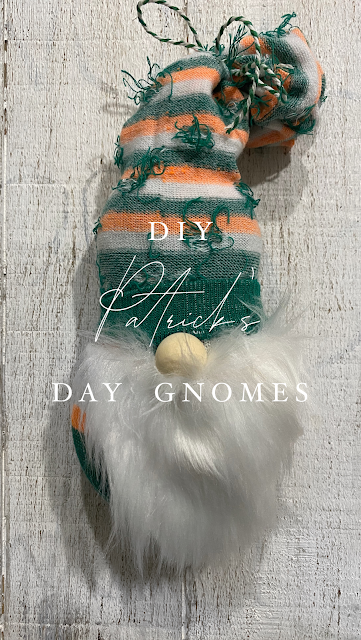
a St. Patrick's day Gnome
There will also be a few other projects that are always a surprise!

Would love for you to join us!
Shoot me off an email with your registration
juliepitta@rocketmail.com

Friday, February 21, 2020

Paper Pumpkin Lovely Day


The February 2020 paper pumpkin is out and of course
you know me,  I have to change it up a bit.
The new in color Rococo Rose is included in the kit
and it's a stunner.


The kit includes 9 cards and printed envelopes, die-cut labels
and those cute foam word stickers.


I used a rose stamp from a few paper pumpkin kits ago
to stamp the rose in the center of the printed 
piece of cardstock.


Take a peek at the Lovely Day video 
to see how to put your kit together and
also see all the other items in the kit. 


Tuesday, February 18, 2020

Snow day


What do you do when you have a monday off?
Head to the mountains!
Conditions couldn't have been any better, we started
off the morning with grays skies and cool weather 
but by the time we finished our trek the skies opened up
to a crystal clear blue canvas.
We even took our coats off for the rest of the trek!


This is just east of the mountains from Seattle
It's called Snoqualimie pass if you are not local
just a 45 minute hop from the Seattle area.
We are so fortunate that we are so close to be
able to get to the mountains so quickly.


My Hubby and youngest daughter


Wanderlust.....


Beauty beyond words yesterday....
Now back to reality today... work calls!

Sunday, February 16, 2020

Diy Couch Makeover


This is my current couch that I bought last year, and though
I really liked it, it has just felt way to elegant for me so I decided to look into how to add some nail heads to the couch to give it a rustic modern feel to cozy.


Here is a picture of it completed.
I truly love how it turned out and love the more casual feel
it gives the couch.  Although a few friends that have seen
it said it makes it look fancy!
Not the look I was going for!
Anyway,  I do like it. 


I ordered the nail heads from Amazon and chose
the Antique ones.  I already had a tack hammer so
that I didn't need to order.


I started off by using the measuring tape that comes in the 
package of nail tacks.
I used scotch tape to tape it to both ends of the first piece of the
sectional making every inch with a pencil.


I cannot tell you how easy it was to do this.
I used the tack hammer and just gently hammered
each tack every one inch.  
Once I finished the one section I set up the next section
right next to the first one to easily line up the next row of
tack nails. 


I saw online that you can also put the nails much closer together
but I prefer the one inch gap between them as you can see here above.  
All in all it took me about 45 minutes to complete this diy makeover.  
Below here you can see how it turned out.  What a great idea to add to any chair or couch or any other piece of furniture you might want to add a little touch to. 
Click HERE for the nail tacks
they come in all different finishes

Thursday, February 13, 2020

Diy Wall arcylic frames


Today I am sharing with you these diy acrylic frames that you too can make!
I went to our local McClendon's hardware where they sell acrylic sheets that they also will cut to size for you.
So once you decide where you want to put your frames you will then decide on what size you would like.
I chose to have mine cut at 11 x 14" so that I could display 
the photo size I chose which is 8 x 10"


Your next step will be to gently using your largest drill bit
a hole that is similar to the size of the wall mount peg you choose.
I choose to different types off of Amazon.  The ones here in brushed nickel color are skinnier than the ones below I am working on now that are matte black and much thicker.
Make sure you get two pieces of acrylic per picture as your photos are sandwiched between them. 


You can't see it very well in this photo but it is two pieces sandwiched together then held with the pegs.


I tried to get a little closer for you, but still hard to see.
I thought about using just one piece per frame and tried to use the smallest glue dots to hold my picture in place on the front but you can really see the dot especially if the sun is shining on the frame.
Doesn't look so good.....


I am also working on the one below in the black matte pegs
which I love.  Just note, you can see I had to drill farther away from the corner of the black peg ones due to them being much wider in size then the brushed nickel ones.  I ended up measuring in 1" on each side for the black frame where the above one was
just a 1/2" measurement.
I hope you get a chance to try and make one of these. 
I was thinking about doing them over Christmas to give as gifts
but ran out of time with the season being short. 
Maybe this year????

Monday, February 10, 2020

But first, Coffee


Coffee over everything right?
Actually,  I have never drank coffee OR tea!
Hahaaaaa!  My vice has always been chocolate!
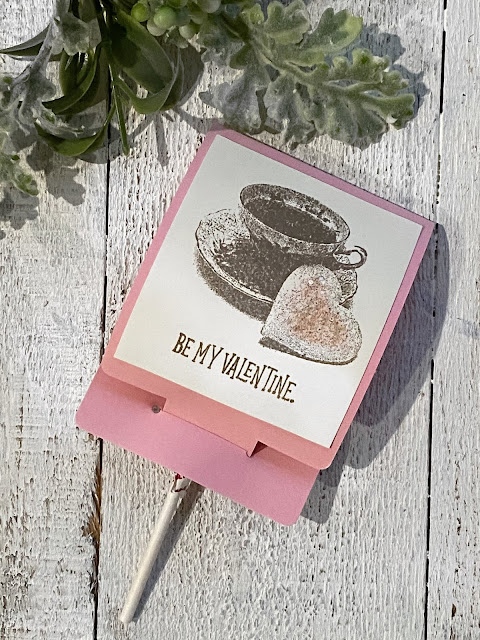
But these coffee cards are pretty darn cute.


I honesty don't know where I got this stamp set,
and think maybe someone might have given it to me.
UPDATE:
With some research I found the stamp set!
Click HERE to view 


I had some cute gold hearts both small and large left over 
from old paper pumpkins.   
So always look through what you have and use it!


These would be cute all packaged up and ready
to give someone with a coffee gift card


Saturday, February 8, 2020

WIT Cellars Creative night


Sharing some of the things we made at the WIT Cellars
creative night thursday night.


Cute little wine labels with a gnomie.
Below both of the Valentine gnomes


We also tried our hand at paper stitching


Some more of the cute gnomes....


Also these cute little coffee suckers 
Next time if you are local, come join us!