Monday, January 31, 2022

Your creations!


Happy monday!
I mentioned I would share with you the little gnome I repainted.
Mine is above, I added a little bit of antique wax to him and have decided I don't like the new look so I will most likely paint him again!
I added him to my little coffee cart and some other little pieces.


You know I LOVE when you send me your creations.
The cute three gnomes above were re painted by 
Susan in Arizona.  They turned out so cute!
Thanks Susan!


I also posted this Valentine card a few weeks past and received
the card below send to me from Krista in San Clemente.
Such a great job! I love to see how you switch things up
and make it your own.  
Keep sending me what you try cause truly this is why I do what I do on here, to inspire YOU!! 
It brings me such joy to see you get creative!
Thank you for making my day ladies!


Friday, January 28, 2022

Dollar Tree Gnomes


Time for a makeover!
These lil' garden gnomes can be found at your local Dollar Tree.
If you don't have them or a Dollar Tree then check out the link below
to order them.
I personally like my decor more on the neutral side so you may chose that you like these little fellas just as is, but my creative mind
says to paint them. 
Gnomes  link 


It doesn't take much to paint them.
If you use chalk paint then the drying time is much 
quicker than with acrylic craft paint, but either works just fine.
I used a sponge brush and country gray chalk paint. 
I painted two coats, but one is fine.


Turned out super cute!
I will add him to my coffee cart with some Valentine's day decor.  Have you seen the cute coffee carts floating around social platforms? 
I will post a picture in the next post to show you!


Wednesday, January 26, 2022

Kisses and Hugs Paper Pumpkin


Back with another Valentine idea from the most
recent Paper Pumpkin.
The triple cards above I cut to make the prior posts candy holders.
With the left over heart I decided to use it for a card. 


I added the creme heart to the blush blossom
card stick and used all the pieces from the Paper pumpkin
kit to add to layers to the heart.  You can just use up all the pieces!


The center heart is wood that I just stamped and
glued it down.  
Do you like to make Valentine's cards?


Monday, January 24, 2022

Kisses & Hugs: Paper Pumpkin January 2022


It's here!  This month's paper pumpkin.  And the kisses and hugs just keep coming with this sweet kit.  Check out all the pieces that you get. 
As usual,  I have chose some alternative ideas that I will be sharing.
                          The first one is a heart candy holder.


These cards come in the kit and are a 3 part card.
I cut one of the hearts off so that I could easily
tape the two hearts together to create the holder. 
I used double backed tape to adhere them together.
I cut a 1/2" piece of very vanilla card stock to create
the handle. 


I made two different ones with the styles that come
in the kit. 


First up is the xoxo heart, super simple.
I had bought some wood hearts, so I took
one and embossed in gold the "o" and glue it onto
the heart and stamped "friend" 


Use double back tape to attach the handle. 


For the pink one just add the pieces
that come in the kit.  I layered them and
add the pink/gold ribbon to the left side.
The ribbon is currently on the clearance rack
on Stampin Up! site right now.  
HERE - Rocco Rose Ribbon


There is always a stamp set included
in the kit, I used the heart in the center
and embossed it in gold. 
When you have them all done,
fill them up with lots of chocolate!


Friday, January 21, 2022

Valentine Gnomes


Happy friday friends!
Remember these cute gnomies from Christmas?
I got these at the Dollar Tree and have quite a few leftover.

Since the dollar tree ones have come and gone,
here is a link to Amazon. 
You get 40 in this batch.
HERE  - Wood cut out Gnomes


I decided to alter them for Valentine's day.
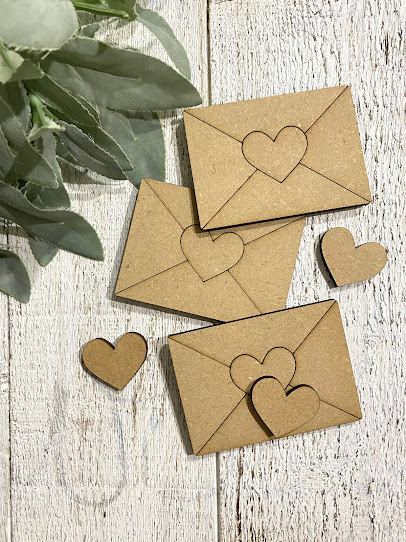
The little pink wood hearts are also from the dollar tree,
then little coffee cup is from a stamp set I have had for years.
I stamped it on white card stock then layered it on top of cardboard
to give it depth. 
(the little wood hearts come painted already which is a bonus, they come in a pack with red and pink, different sizes too.)


I used these three colors of acrylic paint as well as a white. 
You also want to use a very thin tipped paint brush to
paint in the lines. 


All painted and ready to gift.
You can see I pretty much did the same on each gnome with the exception of adding polka dots to the top on. 
I used a white gel pen to add those dots. 
 Easy to control than the paint brush for making circles!


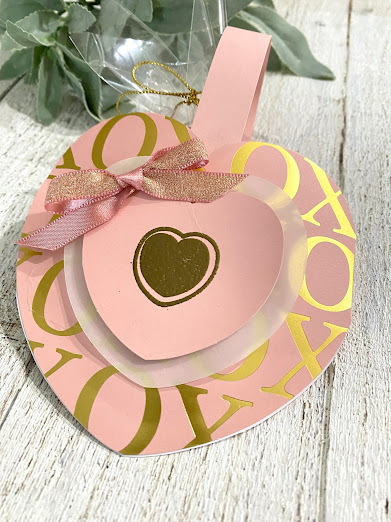
One the coffee cup I added some gold glitter to the heart in the center.
See how the cup looks 3D by gluing to the card board?


Just get out your handy dandy glue gun to attach the wood hearts
and the coffee cup, if you don't have a coffee cup, you could add flowers or a punched out glitter heart similar to the one that I posted
a few days back where I punch out a glitter heart for the girl to hold.


Last but not least,  what to do with these little guys!
Well, first I decided since they have a hole in the top
to add twine to be able to attach them to something. 
I ran the twine through the hole and added a small 10mm
wood bead to it.
Here are a couple of ways to gift them.....


How about a bottle of wine or bubbly or apple cider?
Or here below I added it to one of my 
"fall in love" tea towels to gift.....
I always love seeing what you all come
up with, so if you have any ideas, send them my way!
Spread the love!


Wednesday, January 19, 2022

Valentine's


Thought I'd make a more masculine Valentine's day card to share with you.   I used the wood grain stamp stamped by itself then added a glittered red heart that I punched out and attached to the center.
The 'yay' stamp is from the new stamp set called
Happy and Heartfelt.  
The card stock colors are Soft Suede and Crumb Cake.
This is a super easy card. 


I used a heart punch on hand that I had, use what you've got!
Do you make Valentine's for friends and family?


Monday, January 17, 2022

Yay for Love!


Love is in the air!
Had to crank out the Valentine's goodies.
This is one of the set I show cased in the fall and
even though it dictates holiday styles, I always try
and view it to be used in other holiday ways. 


I stamped the dress right onto the card stock
and then again on pink card stock, cut it out 
and glue it directly over the already stamped one
and shaded it with a pink marker.
I punched out a red glitter heart to resemble a box
of chocolates. 
The stamp sets I used are the below.... super cute sets!


Delivering Cheer Christmas Card with Painted Christmas | Stamp with Jenn

Delivering Cheer stamp set 

Happy & Heartfelt Stamp Set by Stampin' Up!

Happy and Heartfelt stamp set


Monday, January 10, 2022

Valentine Gumball Machine


Happy Monday!
Back with those cute gumball machines
that I picked up this summer and gifted at Christmas.
The company Idaho Custom Creations has these 
3d wooden valentine envelopes sealed with a heart kiss. 


They are mdf board designs that you paint and glue together. 
The lines make it easy for you to follow for painting and almost
feels like you are painting by numbers. 


Start painting the envelope with white acrylic paint
or you can use white chalk paint.  I prefer the chalk
paint as it dries quicker.


Next paint the red hearts, once dry use
your glue gun to put just a little amount of
glue on the heart and attach it to your envelope. 


To add shadow to the lines of the envelope use a water painter and some gray ink to add just a quick line of color to the folds of the envelope to give it a 3d effect. 


Super cute and easy to put together. 
Now they are ready to be added to the gumball machine. 

 So Festive!!


You can check out the wood envelope pieces
at Idaho Custom Creations 
HERE  
 So many cute pieces that can be added 
to your gumball machine 


Saturday, January 8, 2022

Metal Cookie Cutter Ornaments


Well, I'm still over here trapped in the holiday
creative mode.  We are two weeks past Christmas
but I'm creating away.
I happen to be in Target yesterday and they had their holiday clearance going on.  I found these metal cookie cutters for .10 cents each. 
Of course I grabbed a few to play around with. 


I bought the snowman and stars.
I cut some Christmas scrapbook paper 
and glued it along the sides of the cookie cutter.


You can use the Tombow adhesive glue to attach
your paper or just a little bit of hot glue,
just go light on the hot glue or your paper will 
become bumpy. 


I added some wood beads to the twine to hang the
ornaments from. 

These are the stars,  I did the same with them.


This is the snowman all done.


This is what it looks like from the side view. 


And the star,
it's fun to find clearance items you can alter.
Check you local stores and see what you can 
find.  I think it's time to move on from 
the Christmas decor!