Wednesday, February 28, 2018

Bunny Bums 3


New twist on the bunny bums I have posted in the past.  This one is super easy and you can use any smaller sized bag.  The bags I used were from last May's paper pumpkin kit called Sprinkled with Love.  These "bags" are actually envelopes for the cards.


I used another Paper Pumpkin kit stamp set to make the faces on the front of the bags, the kit was the Bunny Buddies stamp set.


I stamped the face on the front of the bag and then used a sponge dauber with Powder Pink ink.
Now, if you don't have theses envelopes, this can be done with any  smaller sized envelope like the ones below.
look on the kraft colored one, I show where to cut it.


Using a pencil, draw onto the bag the ears and cut out with regular scissors or decorative scissors.


I filled the bags with one of the large chocolate Easter eggs and tied around the ears the pink ribbon


I found the large chocolate eggs at Costco, they are packaged in a large bag and you get 60 eggs for $12.99  What a deal!


Cute little bums!


Monday, February 26, 2018

Home Decor


Happy monday morning friends!
Sharing a little bit of home decor with you today.  The long winter days has made me have cabin fever.  With that came some painting around the house. 
If it didn't move, it got painted!


This dresser was given to me some years ago.  It has been blue, red, sage and now oatmeal.  I love how much paint can transform anything.


I'm not sure if I ever have shared the finished shiplap wall in my living room.  This wall originally had two stain glass windows.
It was time for a update and change.  I use plywood to make my shiplap walls.   Super easy to work with once you have Home Depot cut the pieces for you.  And they will do this FREE!


Isn't this bunny topiary adorable?
I was shopping with my Aunt a few weeks ago and she bought him for me for my birthday.  We found him at Marshall's for $24.99


Mantle inspiration
love this sign that I made.  It reads;
I hope there are days
where you fall in love
with being alive.
Such goodness!

Saturday, February 24, 2018

Mini Embroidery Hoops


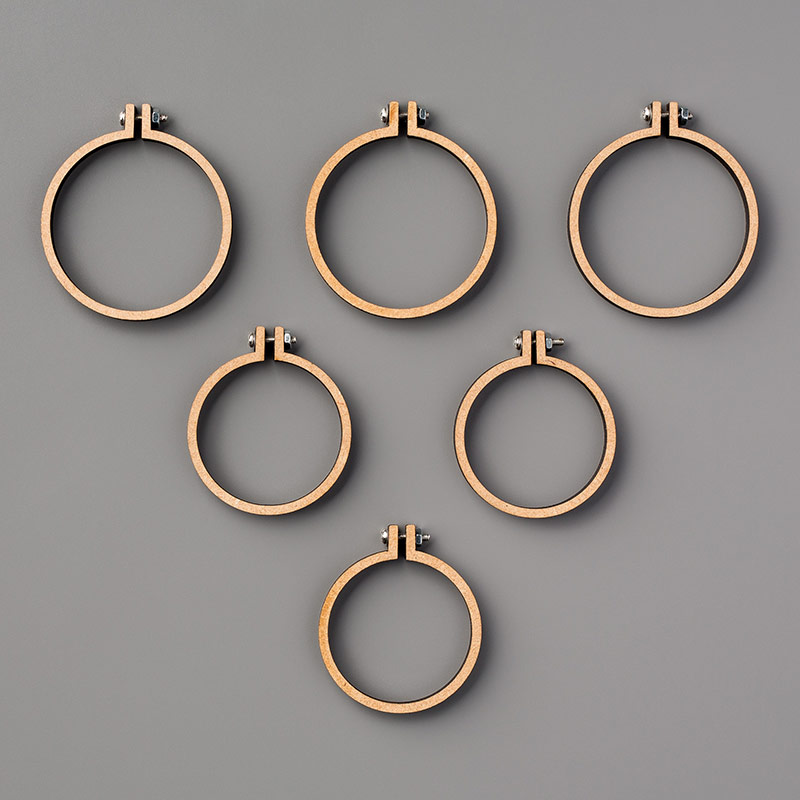
Aren't these cute!
I've been playing with our mini embroidery hoops
They are very small- 1-1/2" and 1-3/4"


I put a dime next to the two sizes so that you can see how small they are.


Here they are, I think they would be cute on the front of a card, or hung on a bottle of wine or on top of a gift.....


Mr. and Mrs. 


Love


Hello

Frame your art or make these ornaments with these mini embroidery hoops

You get 8, four each in 2 sizes
The sizes are 1-1/2" and 1-3/4" 
for $9.50
Order HERE

Mini Embroidery Hoops

Thursday, February 22, 2018

Wildflower Wishes


Paper Pumpkin february 2018 Wildflower Wishes.
  These are just a few more pieces that were left, they are the small pieces of crumb cake cardstock that were to go over the top of the original design.  They are printed on top.  Fold them over and make small cards with them.  I used some white tags leftover from past kits and leftover glitter brads I had on hand.
I try and use up ALL the things in the kit.


See above how it says "sweets"?  
I added the "s" on the end.  The stamp says "hello sweet" but I wanted it to say "hello sweets" 

The little cards are in the picture below all the way to the right at the top

Image result for stampin Up Paper Pumpkin wildflower wishes


I was able to make 8 mini cards total.  Not too bad! 
Use up ALL the things in your kits friends, challenge yourselves!

Tuesday, February 20, 2018

Wildflower Wishes


If you have followed me for a while you would know that once I receive my paper pumpkin kits I love to redo them.
I try to keep it simple when I look over and redesign them to my liking.  
This month's kit is so dainty and sweet.
 Of course I did redo it just a bit.


I talk a lot about the Big Shot,  If you have yet to see one. Here is what it looks like.  It has different platforms used when you use different framelits, or embossing folders or dies in it.


For the cards in the kit, the slight change I made was to emboss the Falling Leaves embossing folder to add a soft touch to the back with the flowers within the lettering being so busy.


                                        Image result for stampin Up Paper Pumpkin wildflower wishes

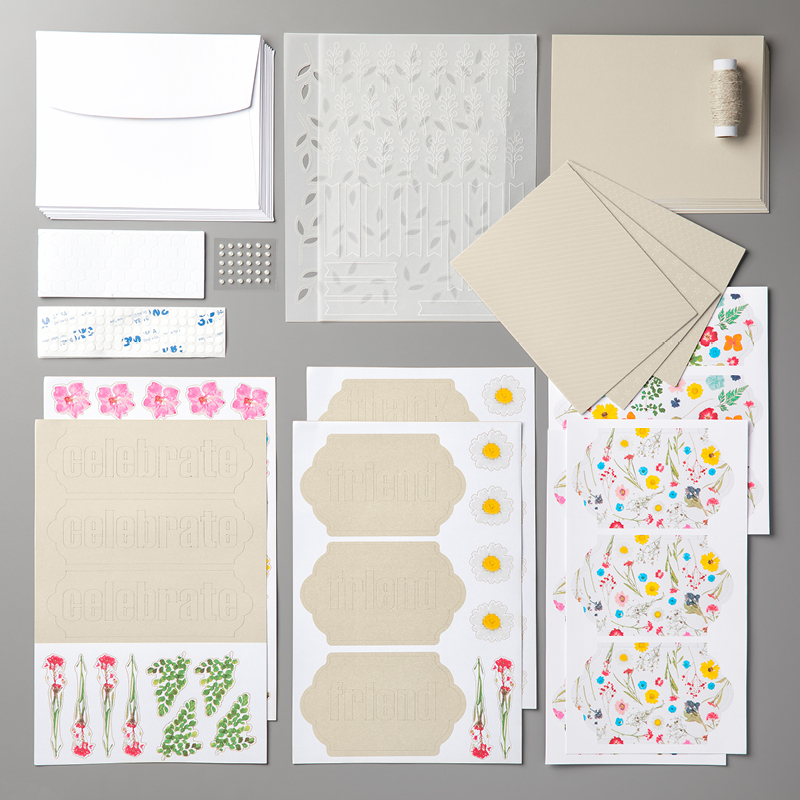
This is what you get in the kit this month,  there is quite a bit in there and plenty left over for you to create many more cards.  There are even some beautiful stickers in it this time.

 
                                     Image result for stampin Up Paper Pumpkin wildflower wishes

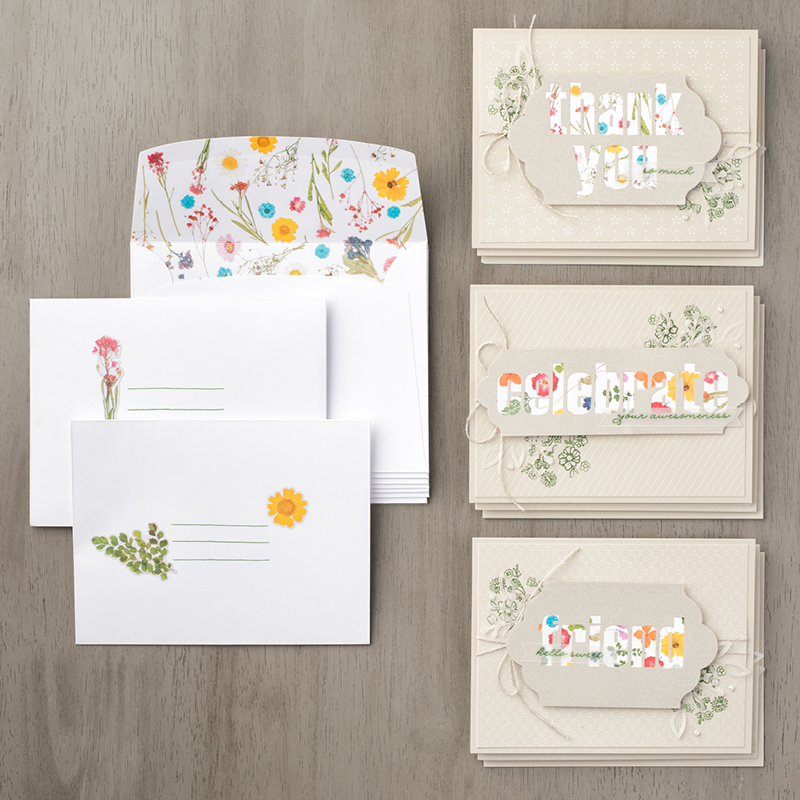
Above are what the cards are suppose to look like once you follow the directions.  You CAN are are allowed to think outside of the box my friends!


I love the look of the embossed leaves on these cards.  
It's just a soft added touch.
I also used some baker's twine to add a pop of color to each card.


Monday, February 19, 2018

Ottomans


Hi friends!  today I'm sharing these ottomans that I have had in our guest room that needed a serious makeover.   I love how they turned out, and they took little effort to make. 


I started by purchasing a shower curtain at Home Goods.  The one I found had a bit of a texture to it compared to many shower curtains that are thin and/or shiny.  This one is a Tommy Hilfiger for $12.99.  Pretty good price compared to the price of fabric at the fabric store.  
To start I folded it in half and then cut it in half.


I then figured out how big the top of the ottomans were to determine how big to cut a piece to fit the top. 
Once I determined this, I used the rest of the material to wrap around the ottomans to cover the sides of them.
To do this, fold them the long way so that you can wrap it around the ottoman and pin it so you can sew it.  
I used the sewing machine to do this part.


This is one of the ottomans in much need of some love.
I cut the existing skirt right off to make it easier to work with.


Once the sides were sewed up I slipped the cover over the top and slid it down to fit the ottoman.  I made them a bit tight intentionally.  The piece that I cut for the top I then hand tucked down the sides of the ottoman and then fuzed together with Stitch Witch which is a type of adhesive for fabric.  Works amazingly!  and I didn't have to do any sewing!


The bottom is finished off by folding the material to the bottom and using a staple gun to the the material in place.
I finished it off by adding the white pom poms.  I couldn't decide whether I should put them on, but the original design on the ottomans had a piping and I felt it needed covering.
What do you think? 

Saturday, February 17, 2018

Hello Sunshine


Hello Sunshine!
Waking up to no sunshine today, but snow on the way!
I used the leftover piece of cardstock from my post a couple of days ago.  It's the reverse image of the sunshine I punched out.
Such an upcycler (is that a word?!) 


The sunshine is a framelit in the framelit set called Sunshine Wishes.  The hello is from the stamp set Four You
Have a wonderful weekend friends!

Thursday, February 15, 2018

Sunshine


Who needs a little sunshine?
How's it in your neck of the woods? 
 We are still in the dead of cold winter. So who could use a little sunshine?  This ones for you!


I used the sunshine framelit from the framelit set 
Sunshine Wishes.
I added glitter to the sunshine with the Wink of Stella pen
The flower stamp is from Bike Ride, I stamped it times across the top and bottom and then colored in the flowers.