Thursday, June 30, 2022

Nature's Harvest


Hello friends!
Been so busy with weddings and family visits that I have barely gotten a chance to get some creativity in.
This is a very simple summer card made with the Nature's Harvest stamp set.  It's hard to tell but I used Early Espresso ink to stamp the flowers as the background and the hello.
The yellow is Daffodil Delight.


I stamped the flowers all over the background
and lightly colored in the flowers with the Daffodil Delight. 


Also layered up the card with the same color.
The color behind the "hello"
is Soft Suede. 
Get your creative on! 


Monday, June 27, 2022

Wedding weekend


Good Morning!
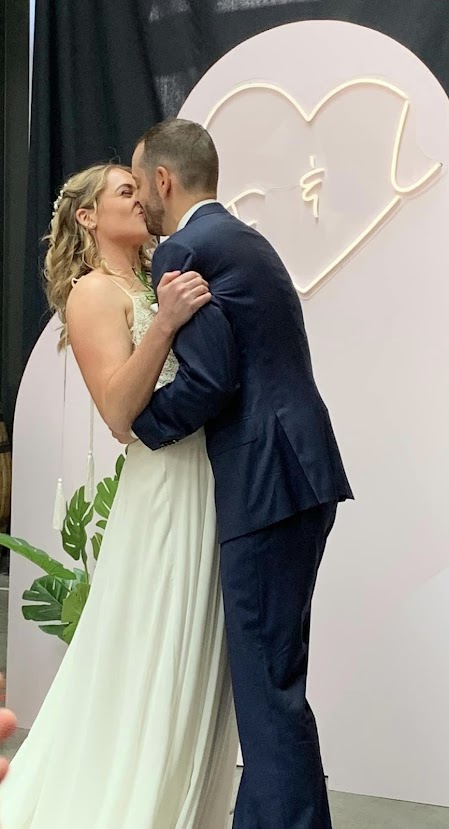
Such a busy wedding weekend, the third of the season
for me.  This one was extra special as it was my Niece's 
wedding and she asked that I be her wedding coordinator for. 
The veune was Westlund Distillery in the sodo district of Seattle.
It's a whisky distillery, super cool vibe. 


The bride had the vision for the entire wedding and when you look
closely you will see how unique it was considering all the other weddings out there.  This one had a more Palm Springs/ LA vibe
lots of tropcial bright colors too.


The bride is very talented and made all her acrylic signage,
the above wooden structure that they were married in front of
was made by her brother in law.  It's light pink and the neon sign
light's up.   She made the set up on me so easy!


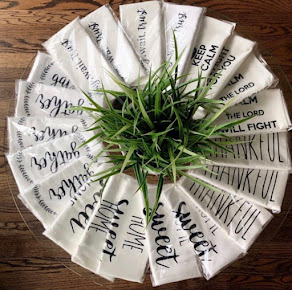
Here card and gift table... more of the signs she made.


They had a happy hour just after the ceremony where the caterer
had set up this gorgeous grazing table.  It was huge!


She used hostas in the table decor to cover the tables with glass 
vases filled with flowers. 


They were married inside of the barrel room then
we did a flip to dinner in between happy hour to 
bring the table together for serving. 


Such a beautiful wedding and the after party, super fun!
It's been a full weekend of family, love and lots of work!
in a good way!


Congratulations Mr. & Mr's Geiger!


The bridesmaids,
these colors and bouquets!


Thursday, June 23, 2022

Faux Metal card


Hi coming back at you today with a similar card
that is called the faux metal card.
If you followed along with me the last post I showed you a card
that was called "Black Ice" where you use clear embossing powder
and create a iced looking card.
Today's card look is similar but is just to resemble
faux metal, almost a foil look.
The process is the same just a few less steps.


Start with your foil cardstock and stamp the images of your choice,
I used the same ones as I did for the Black Ice card but also show you below a few more ideas with others stamp sets, so scroll down for more inspo.


After you stamp both images using th StazOn black ink
you will go back over the images from left to right be lightly and gently swiping the stamp pad over the image to create that distressed look. 


It almost resembles a streaking effect. 
Super pretty!


Layer it up on some Basic Gray and Basic black cardstock
and you have a show stopper!


You can see how it works well with many types of stamp images so check what you have on hand.
Do you see a sneak peek here? 
The card with the barn is a new set coming July 1st!
It's a Christmas season set, but really could be used all year long.
Get our stamp lists ready!!!
Have fun trying this techinque!


Tuesday, June 21, 2022

Black Ice card


Good Morning!
Are you ready for a new technique?
I have seen this idea and thought it was such a neat effect.
I will also post another similar technique in the next few days for you.
To start off you want to get yourself some of the silver foil cardstock
from the Stampin Up! catalog.  The package comes with 3 sheets of 3 different colors, silver, gold and a copper.  They are gorgeous and easy to work with. 
I cut my main piece of silver foil 3 3/4 x 5 and the small center piece
at 2 1/2 x 3 3/4.


You will need some black STAZON ink which is a permanent ink
for the project.  Using the marble stamp from the Artistically Inked
set, ink up your stamp really good,  I'm really good.  the Stazon ink
dries quickly so you want a good amount on the stamp to get the image
to nicely stamp.   Go ahead and stamp directily onto the foil. 
Doesn't that look amazing?


A little side view for you......


Next I stamped the smaller piece with a brand new 
(sneak peek for you!) of one of the new fall stamp sets
coming available in the new mini catty July 1st.
Now, if you don't have either of these stamps, look at what you do
have to create a background and then also look for something instead of leaf.  Get creative!  And don't be afraid to try different looks!


Have you tried embossing?  That's the next step!
If you haven't tried this magical product you really must.
You will be using a heat gun and some clear embossing powder.
I was out of the fine clear embossing powder and used my thick 
powder and it worked great. 
Grab your Versamark pad and using the pad itself 
touch the pad to the paper til you thick you have swipped enough of the pad over the paper, now sprinkle the powder over the paper to 
coat it like you see in the photo below. 


Using your heat tool, heat up the powder and watch the magic begin!
You can see in the photo how it starts to bubble and turn.
So cool!


So cool! 
This is what it will look like when it's all covered!
This is the ice!


So pretty!
The thing that makes it black Ice is a step that you will want to do right before you add the embossing powder, I chose not to add the black to this iced card but want to show you ideas with the black ink added.


Here are a few cards with the black added,
Once you have stamped your images take your StazOn ink and gently swipe some of the black ink across each piece of the foil so that it creates light lines.  Let it dry for a few seconds before moving onto
your next step which is the embossing. 
I hope this isn't confusing.  
This is the card I swiped with the black ink...


Gives it a more distressed look, 
still very pretty.
This is the black ice effect....
Hope you give it a try! 


Saturday, June 18, 2022

Artistically Inked


How about a little romantical weekend?
Coming at you again with the Artistically Inked stamp set.
I used crumb cake cardstock for the background paper and stamped
flowers in Soft Suede.  Cut a piece of Canjun Craze cardstock for the
strip down the middle. 


The flowers were stamped on white cardstock with Petal Pink ink and cut out and popped up with dimensionals. 
The leaves are Old Olive and Pear Pizzaz.
I used a left over Vellum circle from a Paper Pumpkin to stamp
the sentiment on.  
Add a little glitter to the flowers and there you've got 
one very romantical card! 


Thursday, June 16, 2022

Nature's Harvest


Hello and happy thursday!
How about a little bouquet for you today!
This set getting used quite often lately,
I hope to start showing you some of the new stamps set
from the 2021/2022 catalog.

I've shown quite a few other cards from this set in earlier posts.


The background cardstock is a creamy white
and the gray strip is called basic gray. 
I stamped the flowers on white
cardstock and colored them in with
Old Olive, Crushed Curry and Highland Heather 

'
I used the saying in the stamp set to set on top
of the flowers.  
That's it!
You can do this!!


Monday, June 13, 2022

Father's Day


Bringing out all things for Dad!
With our current catalog switching over to our new one I have yet to get some more masculine type stamp sets to share so I have went into the stamp vault to find a few stamps that I could use to create a card. 


The background stamp here is called 
"Off the Grid" and the tree is from the set "Winter Woods"
Sometimes you just have to go with what you have. 


I stamped the little wood block and stamped "enjoy" on it. 
The colors I used are Crumb Cake, Garden Green and Basic Black 


The tree is stamped right on top of the grid.
You could use any textured background stamp to get
this effect as well as any tree stamp you have on hand.
See what you have!


Saturday, June 11, 2022

Nature's Harvest


Happy saturday!
coming at you with a spring like card made with the stamp set
"Nature's Harvest".
We have had record breaking rainfall here, which means
lots of indoor projects.


Trying to bring the outdoors of spring in!
I picked up the Night of Navy color in the background
paper and pulled it in on the ink and the banner. 
I also stamped the line art flowers in Night of Navy
and fussy cut the flowers out and layered them
behind the banner. 


Here comes spring!