Thursday, September 13, 2018

Halloween Crate


I told you I had a halloween crate to share too,
made just the same as the Christmas ones
the instructions are below
The mini gable boxes can be purchased 


The stamp set I used is called Spooky Sweets
from the new holiday catalog.
You can view it 

Take a look at how to cut the gable 
boxes.  Just cut the sides off and then
hot glue the paper straws to the handles

Tuesday, September 11, 2018

Christmas Crates


Let's get to some holiday fun!
These "crates" can be made for any holiday, I also have one to 
share with you for Halloween too.


These are made with gable boxes which can be found 
HERE (gable boxes)
I also used paper straws.  You can use any that match your design.
I used what I had on hand.  To attach the straws I just hot glued them inside the handle.


The cute red christmas truck is from the new catalog, 
the stamp set is called Farmhouse Christmas


side view


Aren't these little characters so mischievous!
I fussy cut out the little elf and santa and glued
them directly onto the box


I glued santa right onto the box and popped up the
elf with dimensionals.  
This designer series paper is called
Santa's Workshop


Each little crate is filled with Christmas candies
I tied pom pom trim on mine as that is what I had
on hand.  You can add any ribbon that matches your design


Here's how I cut the boxes.
Cut off the two sides as you see in the picture, then
assemble the box and glue the straw to the handle
The possibilities are endless!


Sunday, September 9, 2018

White Pumpkins


Anyone else as excited for fall besides me?
Bring on all the flannels, cooler temperatures, leaves falling, 
fall decor, etc.
I found these cute little white clip on pumpkins at the 
Dollar Tree.  They come three to a package, for yes, $1.00!
They do come in other colors too, orange and red


You can see they have little clips attached to them
also notice how they are speckled too


You can imagine the possibilites, they will clip
onto about anything.  I used mine and clipped them
onto the leaf of the potted plant above
Are you beginning your fall decorating?


Friday, September 7, 2018

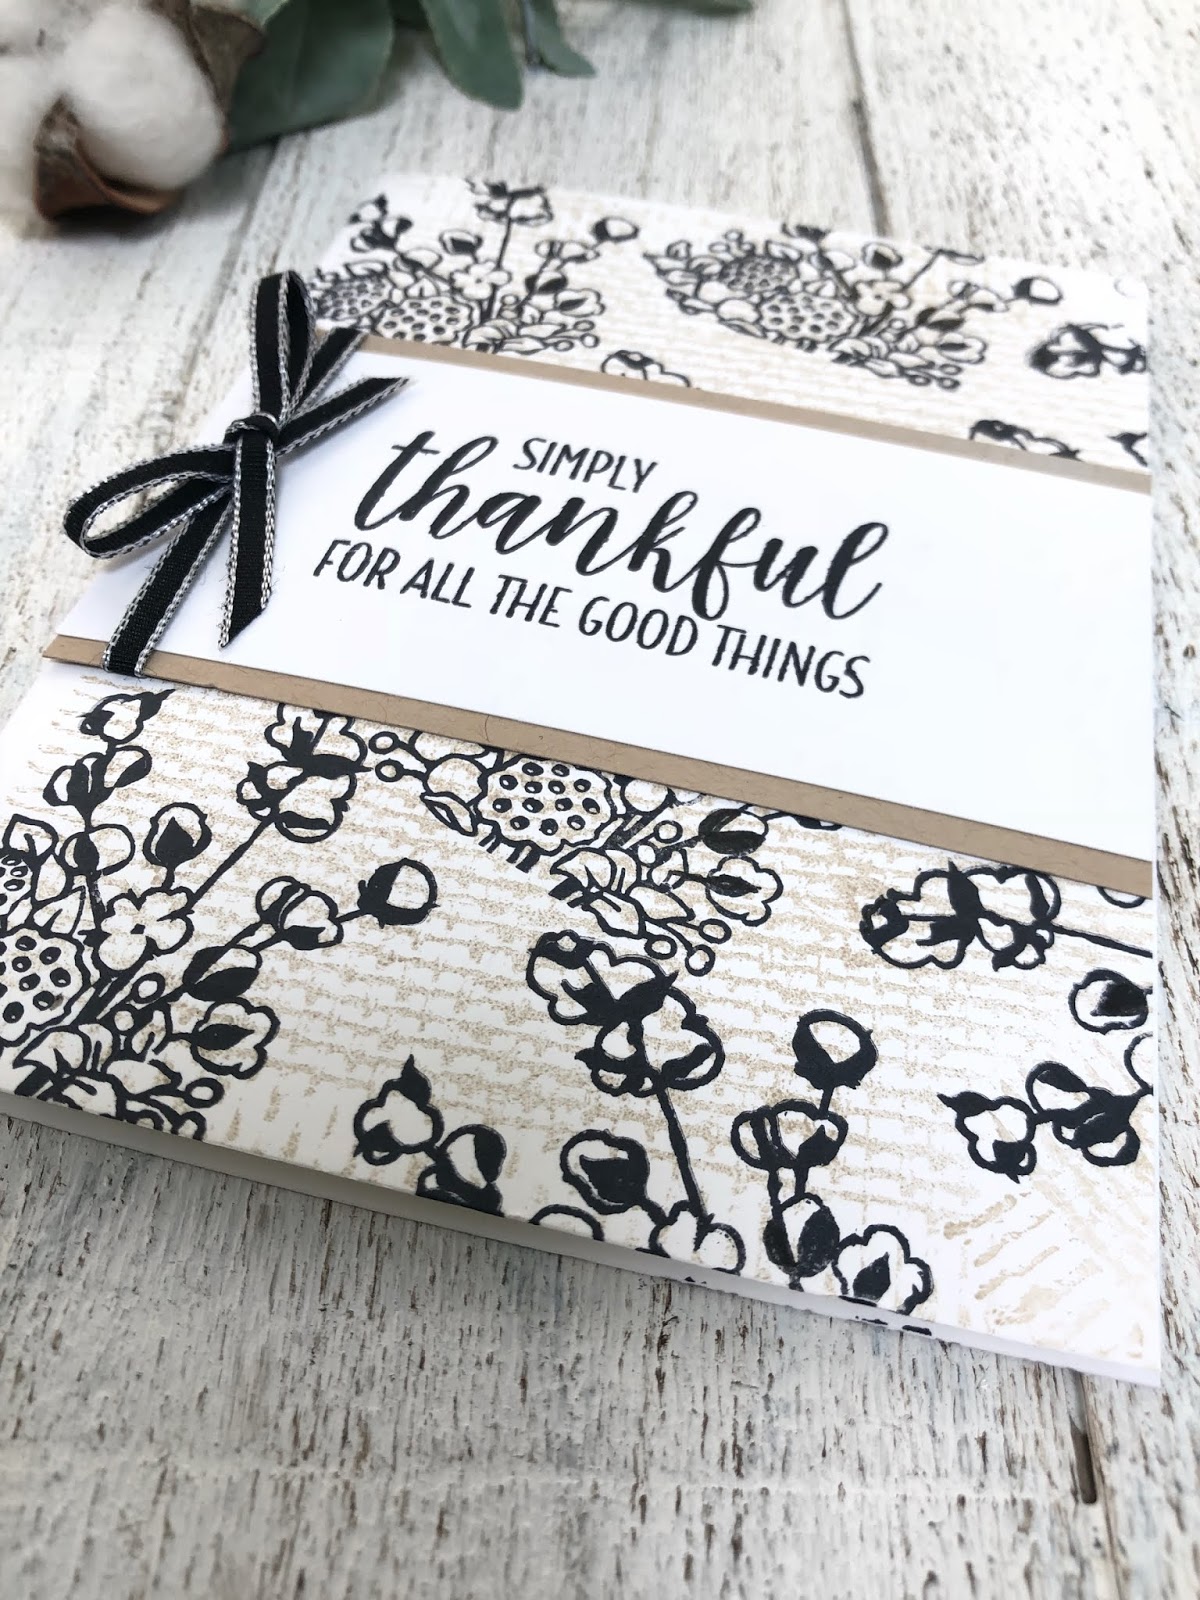
Country Home


I think you are going to have to get used to being bombarded
with quite a few more posts with this set! 
I hope you like them!


I started with whisper white cardstock and used the Burlap background stamp to create the background with crumb cake ink
I used basic black ink to stamp the flowers all over the entire card 
and add the Thankful quotes on top

Wednesday, September 5, 2018

DIY Pumpkins


Let's get ready and excited about fall!
Here are some really easy diy pumpkins for you to try.
They are no sew made with toilet paper! 
yes! you read that right!
keep reading.......


The black and white one is a full roll of toilet paper


The blue one is a half roll of toilet paper


Here's how I made them...
I purchased a set of 4 table napkins at Homegoods for $5.99
You can also use fabric if you like.  I just like the fact that the napkins are the perfect size and I didn't have to sew anything.
Start by laying it out on your surface and set the roll of tp in the center of the napkin


Now this is an unusual step, to stuff the pumpkin and make him
plump I used what I had on hand and wrapped two plastic grocery bags around the tp roll
(if you have batting then you can use that as well)
again, I'm all about what I have on hand. 


Start by taking the napkin and pushing it into the center of the toilet paper roll till you get the entire napkin tucked in


keep going......


Once all tucked in it should look like this (below)


What I did for the stem was go out to my yard and find
a large branch and cut it to size, about 4"
At this time push the branch down into the center of the 
pumpkin.  Now,  I chose not to glue any of my pumpkin.
No need to, it all stays in place without.


Once I put the stem in place I added a little greenery which I just
pushed down the cetner as well.


And here it is all complete!!!


Now, if you want a smaller pumpkin, check your bathrooms for a 
half used roll of tp.  Use the same step as above to make the smaller version as I did with the blue pumpkin

***NOTE****
If you would like see the video on how to make this go to my instagram account, the video is 
in the highlights.  Visit my instagram account
by going to my blog's home page and click on the 
icon on the right, third one over

Monday, September 3, 2018

Beach Time


I got to spend a much needed time away with a dear girlfriend who is preparing to move.  We had such a restful, tranquil visit walking the beach, long talks and of course creating!


We were over on Vashon Island, it's a 15 minute
ferry ride from Seattle.  Small island of 10,000 people, 
very quaint and slowed down way of life
We walked the beach and collected so many heart shaped rocks, we couldn't believe how many we found.  We ended up picking just the right ones to make these driftwood plaques


They turned out so pretty!


We also collected alot of driftwood and made these awesome stars
So fun to make!
It was really hard to come home. 
 It brings me so much peace being at the beach or mountains.  
I hope friends you are out enjoying 
this Labor day weekend!


Saturday, September 1, 2018

Halloween Stitching


So giddy about it being Sept 1st!
all the fall feelings are creeping in!
And my halloween stitching is all finished and 
framed.


I started with a piece of cotton muslin and stamped this halloween
image directly onto the muslin and starting stitching
It didn't take long since the image itself is 4 x 4" 
Once completed I had an old black frame that 
I put to use and put it to use.
I love how it turned out!


I only used a few embroidery thread colors to complete this
orange, black, and gray


As you can see I didn't completely fill both of the trees, 
just little sections. 
 When stitching I only used three strands of the 
thread at a time.
I haven't stitched in such a long time. 
 It has been fun to pick it up again!
I hope I've inspired you to do the same!
Happy stitching!