Saturday, June 6, 2020

Layered Leaves


Thought I would share with you this fun and easy card
this saturday morning.
It starts with a basic white cardstock that I cut
at 3 3/4" x 5.
Using the Layered Leaves embossing folder, 
I ran the image through the Big Shot to emboss
the leaves on the paper.


Once done using the Mossy Meadow ink pad and a 
sponge dauber I ever so lightly brushed the ink across
the leaves, being sure not to press to hard.
After that I took my Stampin up' black journaling
pen and just dotted three little dots along the leaves.
I add the sentiment and some linen thread and 
there you have it!!


Now if any of these items sound foreign to you,
here they are below minus the Big Shot
The embossing folder is called Layered Leaves
and has just retired, but our new catalog is out 
and you can get one very similar called
Meadow Moments #153126 - you get two embossing 
folders both different from each other,
that will do the trick also.
The sponge daubers are so fun to work with whether shading or blending colors,
Sponge Daubers - #133733 for $5 - you get 5 of them
Mossy Meadow ink pad - 147111 for $7.50


We are now offering two different cutting machines, no 
longer called the Big Shot but "Stampin' cut and emboss Machine"
There is a large one for $120.00 - #149653
The smaller on for $60.00 - 150673
They both fold up for easy storage the larger one is for full sized embossing folders and works with all commerical and Stampin Up!
dies and embossing folders.
The smaller one works with the mini smaller dies and embossing folder that are sized at 3 1/2" width.
Both are compact for easy storage and travel
So pretty too!
Can't wait to order one!
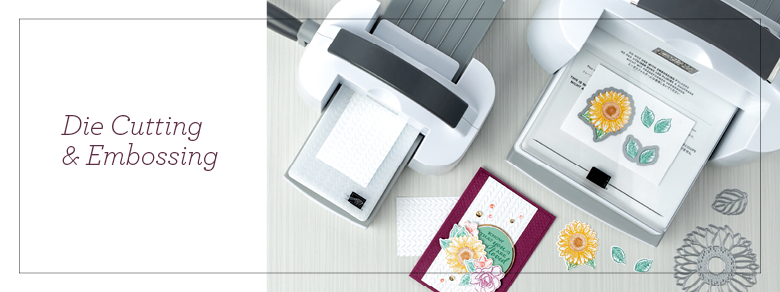

Cutting & Embossing

Thursday, June 4, 2020

Diy Accent wall


Well here sits one very simple, boring wall.
that needed just a little creative attention..


And here is the accent wall finished!
I cannot stop looking at and smiling at it!


This is called board and batten.
I purchased pre-primed mdf board six of them for the dimensions
across my wall which measures 109'.
 My vertical boards are 2 1/4" wide.  I had seen many accent walls 
mostly made with 4" wide boards which I felt is too wide from the
size of my area. 
As a suggestion, I would buy a few different width to test your design before you begin.   Another thing that I did was using painters tape I taped my design on the wall to see whether I wanted a 3/4" wall or a full wall of squares.   There are so many designs out there that you can create on your wall.
For the top piece I purchased that you see me nailing down in the photo, it is the 3 1/2" mdf board by 3/4"
My vertical boards are 2 1/4" wide.
Once you have your design figured out you can start
to adhere your boards to the wall.


I started with the top board, then centered the first vertical board and added the other four on each side making sure the boards are level with a level tool.
Some people add a board at the bottom to frame out the entire wall but I felt the with my 6' trim at the bottom I didn't need another board there. 


The next step will be to caulk in between each boards for a really
clean finish to the wall.
I personally LOVE to caulk, it's tedious, but really gives you 
a smooth clean line.
Since I purchased primed mdf board, you don't need to prime
your boards, you just paint them!


Coming right along!


Here's another angle of the wall
I love the clean lines and the thickness of the boards
I choose.  Be sure you think about that when deciding your
designs.


And, here it is!
This was truly an easy project, it took my hubs and I a total
of 3 hours with a little of waiting for caulk to dry mostly.
He's so great at the math part of it that he figured out based on the width of the room how much room between each board.
(gotta love those math brains!)


A few more views
We really had this wall on our list to do this fall, but with our
fall like weather we had over the weekend we moved up our plan
and I am so glad we did!
On a side note, I get asked what that thing is in the left corner 
of the room on the wall.
It's our heating/cooling system, somewhat of an eye sore but
what are you gonna do.... 


Tuesday, June 2, 2020

Marbled Countertops


Hello!
Last week I was able to head to a friends second home and 
redo her vanity top.
I completely forgot to take a final photo, but the one
above is a counter I did a year ago and it is the same one 
I did this past week. 


Here's looking down on it
It's really easy to do and by using chalk paint
you can cover any surface.
This picture below is her counter top with two coats
of 1-2-3- primer and two coats of white chalk paint.


To get a nice smooth finish I always use a roller sponge brush.


You can see how smooth it is.
Once I let the two coats dry, I paint very lightly very light
colored, what I call "clouds".


The second step is lightly adding white paint
to mute the gray tones
The last step is making the "veins" in the design.
This whole technique is a layer upon layer effect
that I do.  
To make the veins I use a feather,  yes, the end of a feather
to attain the very light and thin veins.


For me it's just like painting on a canvas, it's just a counter.
I've done three now and although you'd think they would look
similar, they all have differed slightly.
It really is fun to do and quite easy,  you can't mess it up!


Saturday, May 30, 2020

Pateros


I spent the last few days in Pateros a quaint little town just past
Chelan Washington.
I went to do a remodel of a bathroom countertop for my girlfriend's home.  While there we took breaks and walked the river walk there.
The colors and the spectacular backdrops were just stunning.
Here are a few pictures of what I saw on my walks.


So serene.....


This was a walk we did up a hill that looked over the river
as sunset.


This is looking up river from town.
I felt so much peace and calm being here.
If you haven't ventured there it is a must!

Wednesday, May 27, 2020

Hey there


Hey there friends!
Just another sample of a cute and easy card you can make or use for your stamp kits this month.
It's the cute rainbow from this month's Paper Pumpkin,
so if you received the kit then you have the stamp set
from the kit


I chose three light subtle colors to create the rainbow
and just stamped the "hey"
How easy is this!
And if you still have not subscribed to Paper Pumpkin
you can jump on board any time.
It's a monthly subscription that arrives in your mailbox
with everything you need to create what's inside.
Come check it out!
Click HERE

Saturday, May 23, 2020

Well, Hello


Well, Hello friends!
How about trying a new technique?
Do you have a big shot?
How about framelits?
If you have both of these then you can make
one of these cute sentiments.


Starting with your framelit, a piece of cardstock, a pencil
and scissors.  Start by tracing your framelit onto the
black cardstock.  Once traced cut out with your scissors.


Now using your same framelit and your Big Shot,
cut out the framelit in white cardstock


If you have never used a Big Shot this is how the 
image looks once it's cut out.  Just takes a minute to
roll it through the Big Shot and get this result.


Now taking the white piece of "hello" and some glue
attach it to the black piece of cardstock,
Look at the result!   
Now attach it to your card!
That's it!


I used pop up dimensionals to make the Hello raised
to give it a pop. 
I hope this inspires you go give this a try!


Thursday, May 21, 2020

A Kit of Color


And here is the last post of these cute little cards
that I created from the Paper Pumpkin May kit
It's always fun to try alternative ideas with
what's in the kit.


This card is just made with all the pieces
included in the kit I just added the birthday
sentiment.


For both of these cards I used the 
striped paper that is in the kit and cut away
the sides of it to use as a rainbow and added the
cloud.  Using a black maker I dotted the cloud
around the edge. 


Same with this card except I added the "for you"
The colors in the cards are so bright and happy,
I hope this inspires you to create some happy
right now!