Saturday, June 15, 2024

More decoupaged bottles


Happy saturday!
Back with another decoupaged bottle design.
A friend of mine is having a pink pajama paint and sip and 
asked me if I would make up some bottle for their gathering.
This time I decided to add some mini pink bows to the bottles.
How adorable are they!

These mini cuties were made by using the Stampin Up!
retired bow punch.  Seen below.
Since it has retired, I checked and found quite a few on Ebay
that can be snatched up for under $18. 
Thank me later as you will use this continually.


How it works is you punch out the pieces twice and assemble them.
I prefer to use my glue gun to attach all the pieces but I know others
use mini glue dots.  I find it moves quicker using the glue gun. 


When assembling I use a burnisher to round the bows
out before I glue them.


Once founded they will look like this.
Now add just a dot of glue and push the ends together.


You should have two pieces,
now glue the two (fish tails) together like so.


Glue the two bows onto the fish tails making sure
the bow ends meet in the middle.


Now add the little tiny overlay to the center.
Taking care to tightly glue it in the back.


There you have it!
Pretty in Pink!!!


You can add these beauties to just about anything!
Now go and find the punch and get bowing!


So sweet and fun to make!


Thursday, June 13, 2024

Diy Bee Pedestal


Happy thursday!
Run to your nearest Dollar tree and pick out a plate and bowl.
They had lemon patterns and these cute floral and bees.


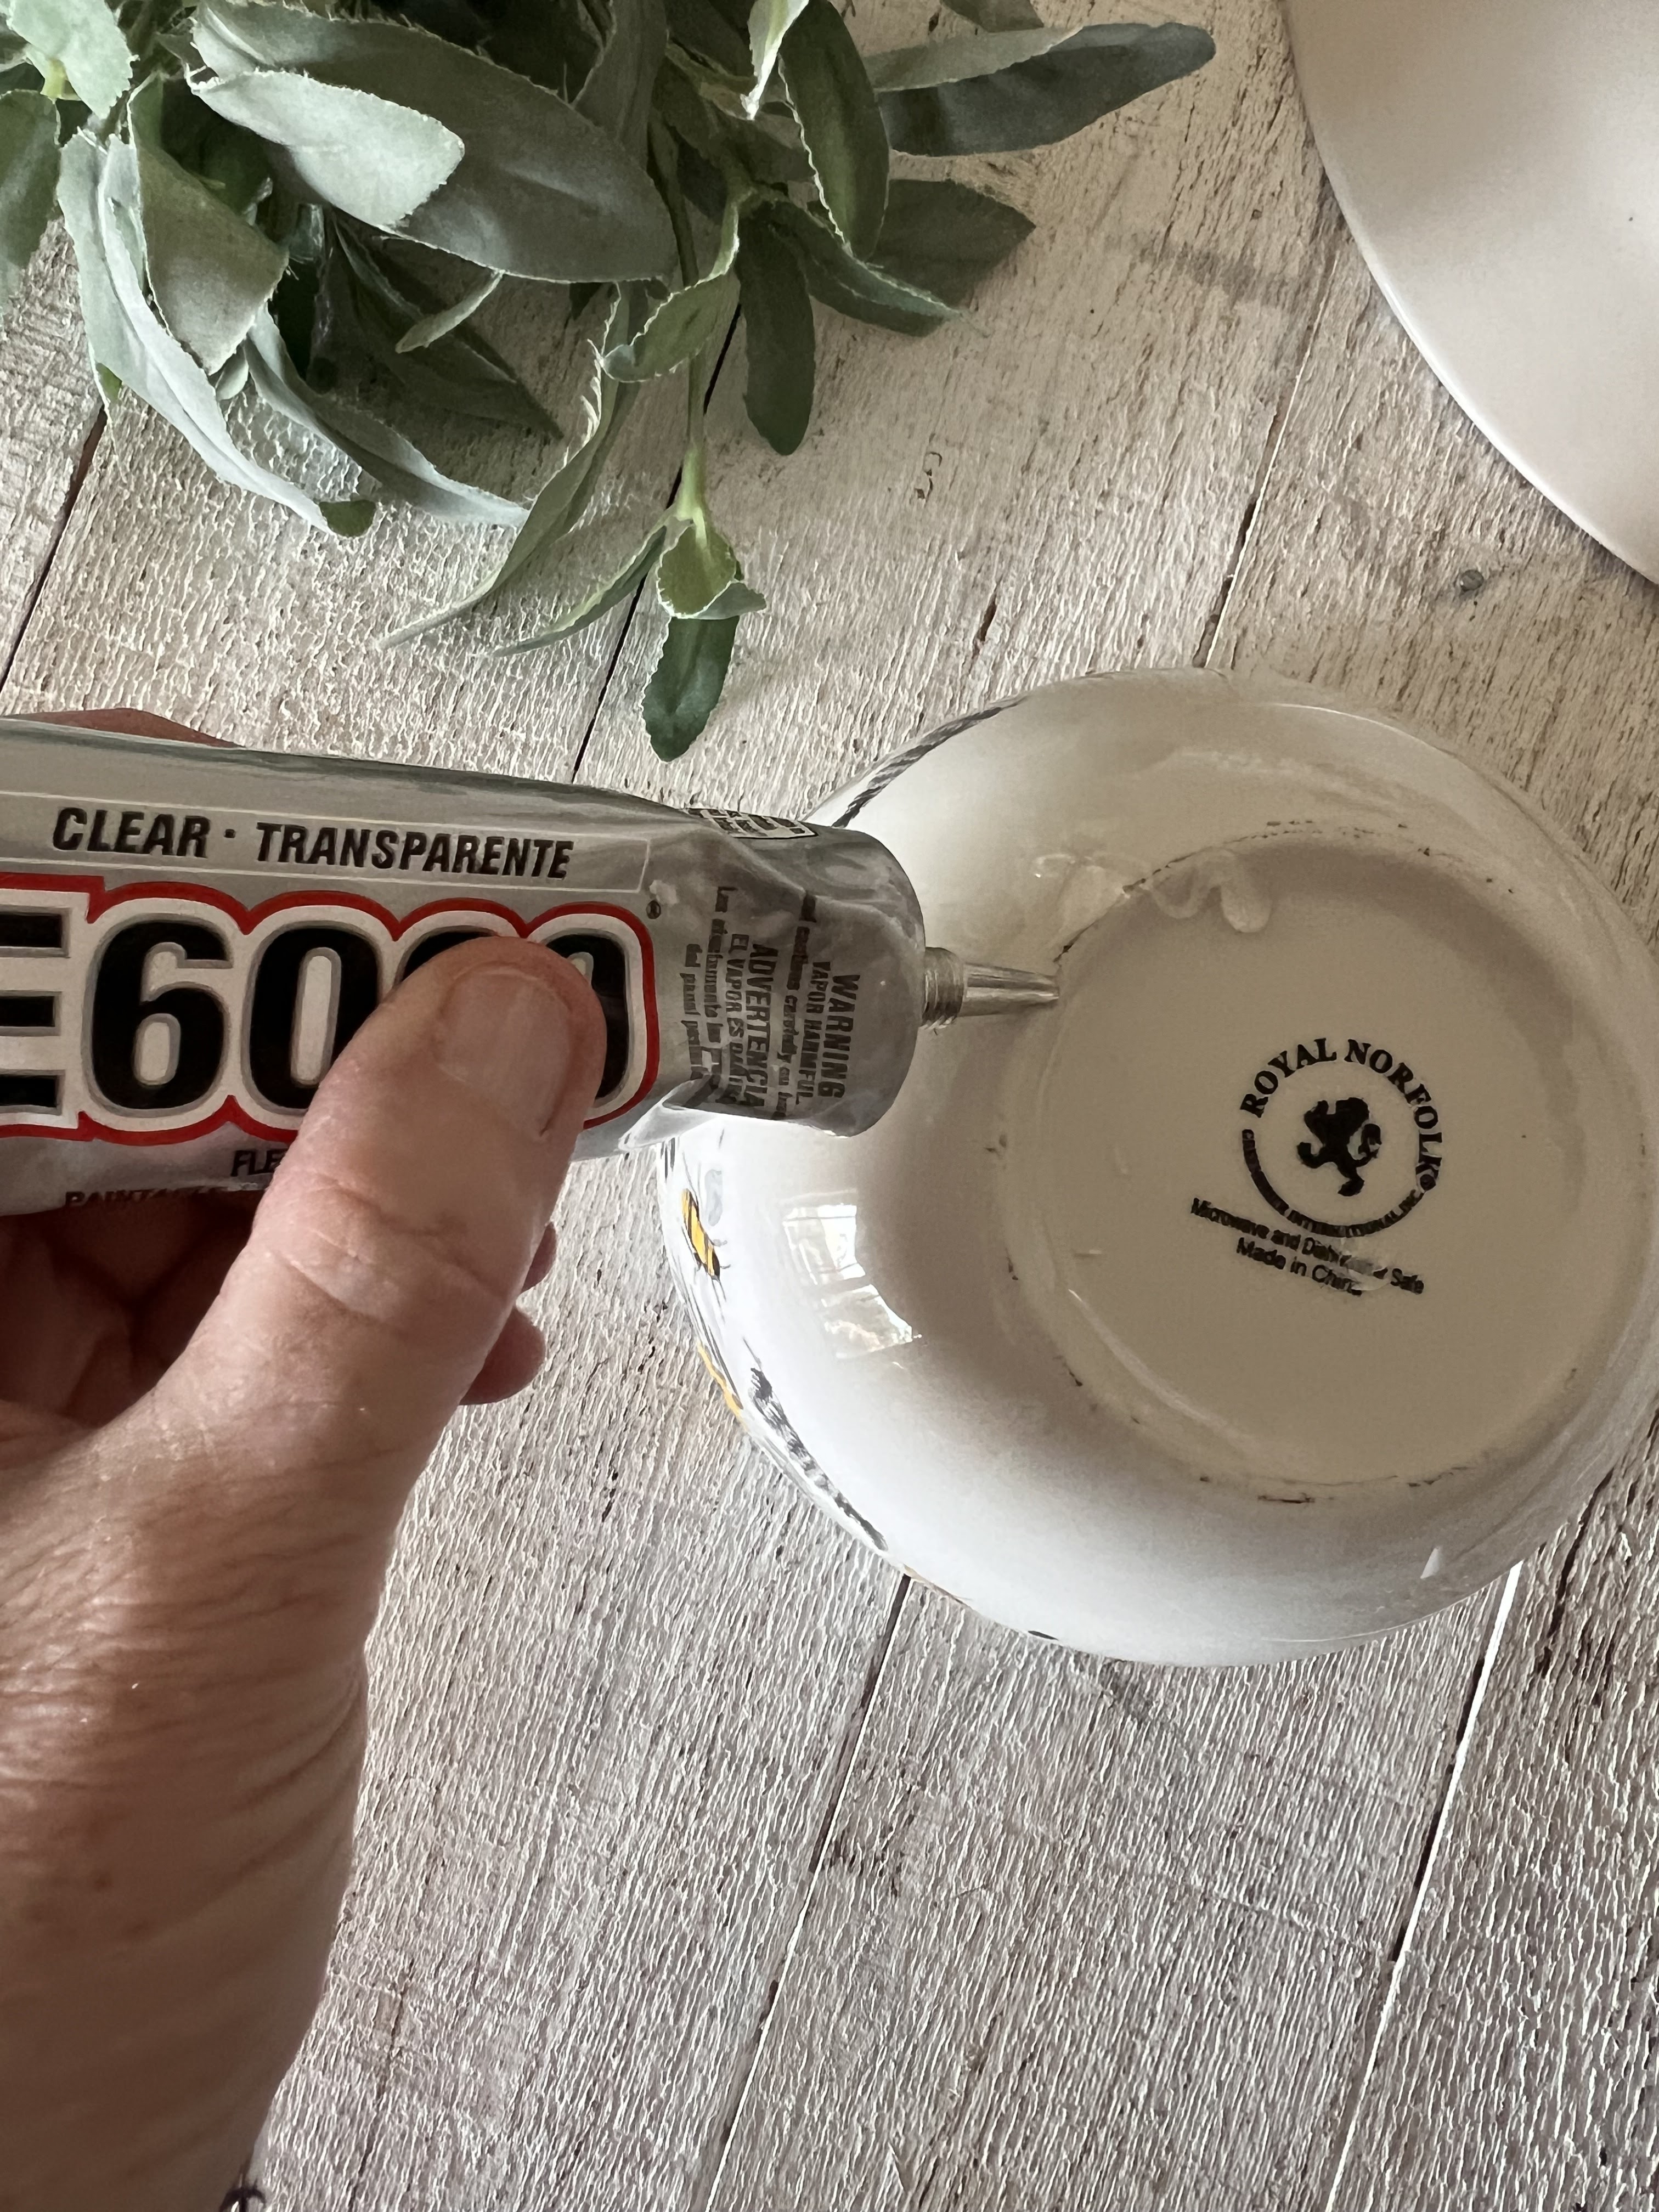
Get yourself some E6000 adhesive and run some
along the bottom rim of the bowl.


I used a generous amount


Now turn your plate upside down and sit the bowl in the center
of the plate.   Keep it this way for 24 hours so that it cures well and dries. 


And now that it's dry,
take a look at this cutie!
You've got a cute cake, cookie or treat pedestal!

Go! find a bowl and plate and get creative! 


Tuesday, June 11, 2024

Peony tablescape


It's peony season!
They are all in bloom over here.
I have this one bush that finally bloomed this year
and I'm not sure what variety it is but the color resembles
key lime pie!


I had a great time putting this tablescape together for 
a luncheon I hosted.  I loved all the pinks. 


try this fun different way to set your silverware,
fork in the center of the plate
and knife and spoon on the bottom. 


Here is the decoupaged bottle that I posted.
All in it's glory....
If you missed how to make one take a peek at my last post.


Sunday, June 9, 2024

Decoupaged Martinelli's


Happy sunday!
Back with another decoupaged bottle idea for you.
This time I purchased some martinelli's apple cider
bottles.


Step one is to tape off the labels on the bottles.
Then using white acrylic paint, paint the 
bottle at least 3 coats before decoupaging the napkins. 


This one below has 3 coats of paint. 


Choose a napkin and some Modge Podge. 


Start to cut your napkin to fit the bottle,
towards the top you will have to cut around the
rounded part of the bottle.


Slowly brush some modge podge onto the bottle
and add the napkin til you complete covering it.


All covered and looking so cute!


Friday, June 7, 2024

DIY Name Sweater


Happy thursday!
It's been a whirlwind of fun over here,
so much going on with my nephews graduation,  the new baby
and the upcoming wedding.
Have you heard of these adorable diy name sweaters?
I decided to give it a try.
Last year when my niece announced she was expecting I picked
up one of these cable knit sweaters from Old Navy and some
pink yarn to surprise her with.
Now that little Amelia is here it's time to make this 
sweet sweater.


I did some research and have seen this done a few different ways.
I am going to try it this way where I printed out her name
in a large font and will cut it out and pin it to the sweater
and start to embroider using the chain stitch to follow
the letters. 


This is the sweater I picked up and the pink yarn 
I found.  
Stay tuned to see how it turns out.
I can't imagine it will take much time to do.
I am so excited to see the results.


Tuesday, June 4, 2024

Wedding card


Happy tuesday!
Wedding season is upon us, 
this calls for some wedding cards to have ready to gift away.
This card has an outside jacket wrapped with a belly band and a 
wax seal.


Start with a 4 1/4" x 5" card for the insert,
the jacket is a 8 1/2" x 5.5" 
Score the jacket at 4 1/4'  on each side. 


This jacket is made with vellum, be careful when you are
stamping on vellum as it takes a bit longer for it to try and may smear easily.  Wait for it to dry. 


If you have been following me for a while you've seen
me make the wax seals.  The one I've made I colored
with a gold pen. 


Look at how beautiful this color looks stamped
on the vellum. 
It's one of the in colors for 2023-2025
this color is called Copper Clay


The card all finished.  Very bridal looking.....


Sunday, June 2, 2024

Peony Tip


Do you LOVE peonies?
They are possibly one of my favorite flowers next to dahlia's.
I have at least twelve peony bushes.
Since I have quite a few, they sometimes bloom at the exact same
time.  I am going to share in this post how to preserve your peonies
and package them away til you need them. 


First check your peony to see if the center feels like a soft
marshmallow.  
If it does, then this is the time you will want to
cut your flowers. 
Here are a bunch that are ready to be preserved.
Cut any of the flowers that have that soft center. 


After you cut them, make sure and remove the leaves
at the bottom. 


Now using some cello wrap ( pick up at dollar tree)
Wrap the top of the buds tightly adhering with scotch tape.


Wrap like you see here, then pull the top over
the flower buds and adhere the tape. 


All wrapped and ready to be put in the refrigerator,
that's right, into the frig they go. 
And did you know that you can leave these in your frig for up to two months? That's how you preserve them and they can be
left in the frig til you need them or gift them.
This bouquet below is after the peonies were
in the frig for 4 weeks.
Just gorgeous!