Wednesday, December 7, 2016

Santa and his Elf


You get a double treat today!
Santa and his elf are in da' house.
Talk about easy cards to put together.  Each card is made by cutting red and green cardstock.  On the elf card add a 2" piece of striped (or whatever pattern you have) paper to the bottom of the card.
Then for each card cut a strip of 1 1/4" x 4 1/2" piece of black cardstock for the belts.  Cut a 1 3/8" square for the buckle.  Gold for the santa, silver for the elf and cut a square for the center.
I used a pair of scallop scissors for the collars and added the buttons.


Monday, December 5, 2016

Oh Deer Creative Class


Happy monday!
The Oh Deer! class friday was so much fun.
Here are the projects we made


wooden deer head birch ornaments


Dry mason jar snow globes, with deer of course! 


Vintage deer cards


Feeling like you missed out? 
Not to worry!  next creative class is scheduled for friday, January 6th- save the date!

Saturday, December 3, 2016

Melted Snowman


Try this melted snowman! 
Get out your punches as your going to need them. 
 I used the 2", 1 3/4" and 3/4" circle punch to create him. 
Once you punch them out then stack them to create the snowman.
I hand cut his carrot nose and drew his mouth and eyes with a black marker


These are the punches I used.  The snowflake punch is for his hands.  His pink cheeks are brushed on with pink chalk.


Yesterday was the Oh Deer! creative class
This group of ladies just makes my heart happy!


This is possibly my favorite picture ever!  
Laurie and Jackie the smiles say it all! 
We were busy elves creating everything deer themed. 
 I will post the collection of what we created in the next few days.


Thursday, December 1, 2016

Christmas Lantern


Good december 1st morning!  
I thought I would share with you this morning how to put together this super cute and easy decor for your home.


I started with a lantern I had already in my decor


I apologize for the pictures not being of quality as they should,  it has been very gray and dark here for the last few days.
Above you can see the truck and trees up close.


Here's another one on how I staged the inside of the lantern


I started with snowflakes and bottle brush trees and a truck I purchased in the ornament dept at Target.
Fill your snow at 1/4" of the bottom of the lantern so that you can see your pieces.  Now just stage them how you want them to look.
I added a tree to the truck bed and also added a small battery operated tea light that glows.   Super Easy!!!!


You can find the fake snow at just about any craft store and the bottle brushes are everywhere too.  I picked up both at Michael's


Just wanted to extend a HUGE shout out and thank you to you all who ordered my new kitchen towels!
I am so excited to be getting them packaged and mailed to you as we speak!
Interested in the towels?
Head here to see them!

Sunday, November 27, 2016

Christmas Hanging Wreath


Gosh, I've seen these gorgeous wreaths all over the place hanging from the kitchen table and thought I might give one a try.  
I started with two of the same wreaths (I had mine on hand) that were already decorated with berries and ribbon, so I didn't have to add anything to them.  (always trying to upcycle!)
I used wired to fit them together with their backs to each other as you assemble them.  
Cut yourself three pieces of  ribbon that will match your wreath.  Mine is red and each piece is cut at 18". You may have to cut yours longer or shorter based on the height of  your ceiling.  I have low ceilings. I used a glue gun to attach to the bottom of the first wreath. 
(you can kind of see this in the above photo)
Bring all three pieces to the center and tie in a knot or bow.  
I have a j hook that is always above my table to hang things, so I just hung mine from it.   


I added some of those little elegant rice lights to it too.
Below is an idea for your table.  Who doesn't LOVE the old vintage Ball mason jar with the closure and lid?   
Fill them up with water and a floating candle, put on a charger plate and add some greens and there you have it!


I hope your already beginning to deck the halls and walls of your home sweet homes, I am just getting started, SLOWLY......

Friday, November 25, 2016

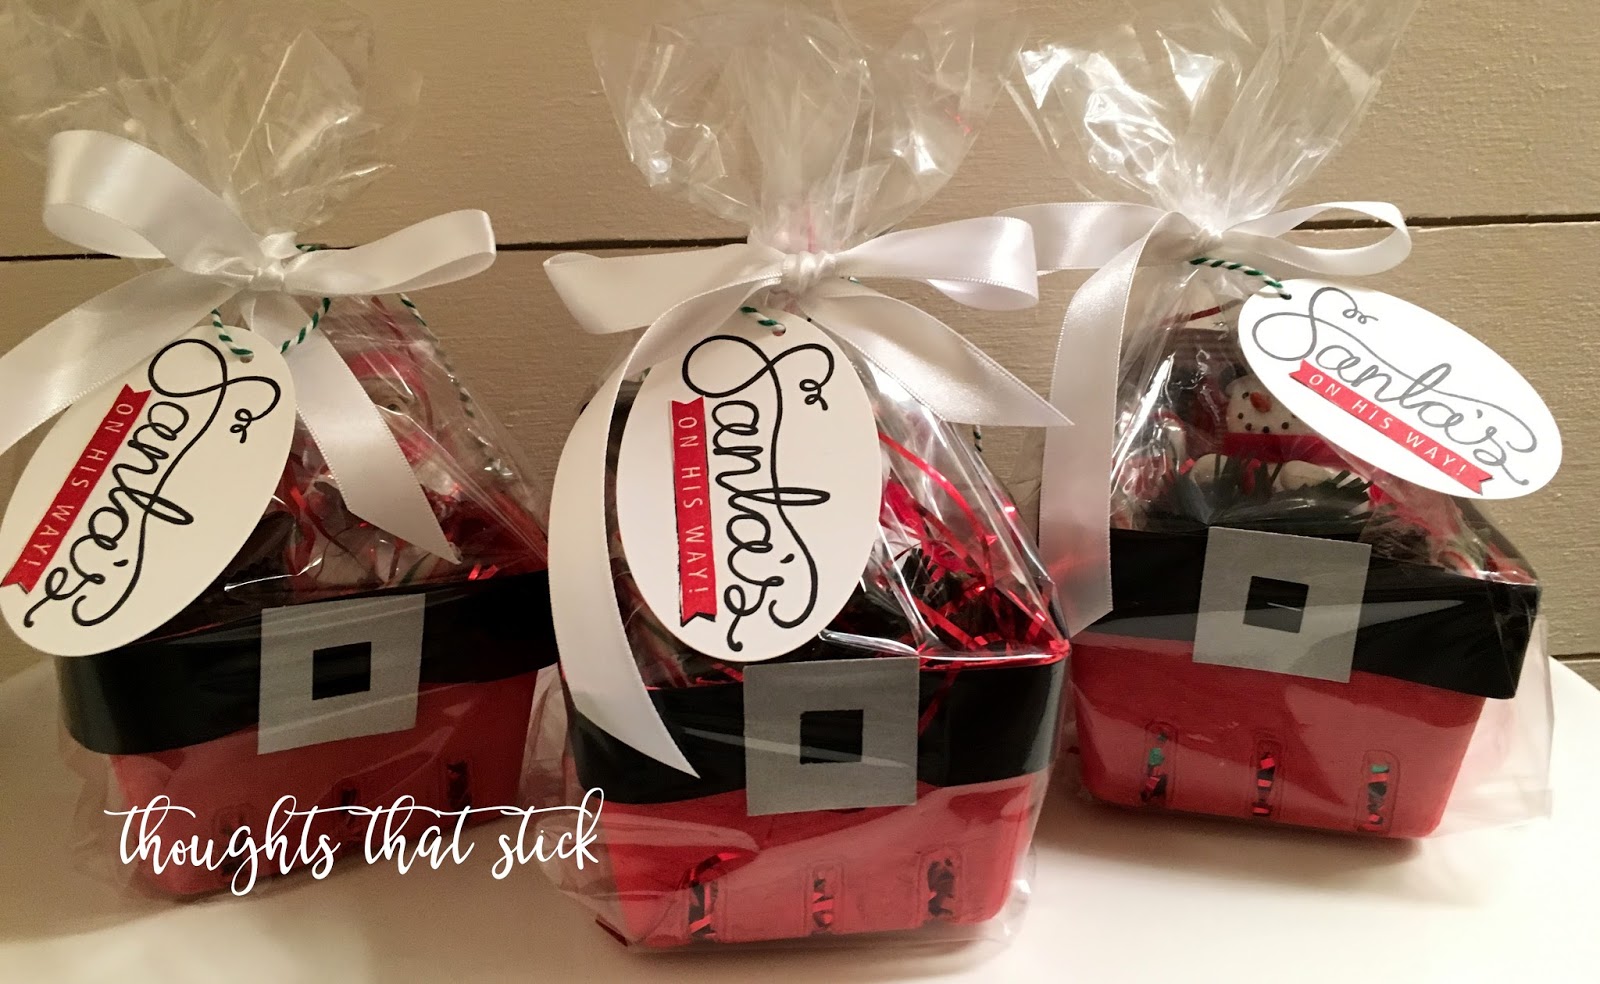
Santa Pants


Getting things ready for upcoming events and classes. I made these Santa pants by using some red berry boxes.  Added black cardstock cut at 1" x 8" and stapled it around the box.  
You create the buckle by first punching out the 3/4" square, then the 1 3/4" square using silver brushed cardstock. 
 Now filler up!  drop it into a gusseted cell bag, add some ribbon and a tag. 


Hope you all had a wonderful Thanksgiving. 
It was great to have family all come together and enjoy just being together, with no distractions. 


Gratitude unlocks the fullness of life.  It turns what we have into enough, and more.  It can turn a meal into a feast, a house into a home and a stranger into a friend.  
Counting so many blessings........


Wednesday, November 23, 2016

Winter Wonderland


November's paper pumpkin is here and it's a beauty!
Look at these silhouette's!  such beauty.
I tend to alter my paper pumpkin, so here's my simplistic version for you. 
 I just layered each piece and then added the glittter, that's it!  


Here's some more wonderful ideas for you to glean from our Stampin' Up! blog


NOVEMBER PAPER PUMPKIN WONDERFUL WINTERLAND

We love all our kits, but we are especially excited about the Wonderful Winterland Kit! We changed the box to match the kit, it’s holiday cards, includes two Classic Stampin’ Spots, and it’s unlike anything we’ve done before in Paper Pumpkin. The laser cut pieces are similar to Edgelits and give the cards wonderful depth and character. As you layer the houses and trees with dimensionals, a lovely little landscape takes shape and helps you feel right at home for the holidays.

PP_Nov_Intended_Use
And since we know it’s on your wishlist, here are some more projects for you to try. (Because ideas are just like presents under the tree; the more the better!)

PP_Nov_4
First up is something you can make with the contents of the kit if you decide to make something different than traditional cards. It’s a tiny little treat holder that is just about the most adorable thing you’ve ever seen! Use a card base to make a matchbox-style holder and slip in a peppermint pattie. It’s the perfect little treat for a friend or loved one.

PP_Nov_3
You know those days when all you want to do is sit by the window with a cup of hot cocoa and watch the snow falling outside? That about sums up this shaker card. Use your Big Shot and some fun supplies like the Layering Squares FramelitsFoam Adhesive StripsMica Flakes Trio Pack, and Window Sheets to recreate this beauty.

PP_Nov_1

If the weather outside is frightful, stay in and stamp this next card. Use the Softly Falling Textrured Impressions Embossing Folder and Layering Circles Framelits Dies along with a touch of silver ribbon from the 3/8" Glitter Ribbon Combo Pack for a card that’s sure to warm someone’s heart this season.

PP_Nov_2