Saturday, March 31, 2018

DIY Marble Counter top


So this is my "lovely" island in the center of my studio.  It has had this counter top for years and I just have always wanted to change it out.  So, I took to doing some research on how to paint laminate counter tops.  I found out it is super easy to do!


I first sanded the counter top and then put two coats of primer on top.  I usually wait an hour between each coat.  Once the primer is dry I used Rustoleum white semi-gloss paint over the top, two coats.
If you want to see step by step videos head on over to my instagram account on my front page to view the how to's


It's a three step process.
Once it's all dry I added two coats of a satin polycrylic.


Here is what it looks like all finished, I have to say I love how it turned out!


Brightened up the room tremendously!
If you want to see step by step videos on the how to's head over to my Instagram account to view how you can transform any counter in your home.  I'm planning on trying this on my bathroom counter as well.  Stay tuned friends!


Thursday, March 29, 2018

March 2018 Paper Pumpkin Wood Embellishments


This is how many cards I was able to make with all the wood embellishments from the free gift in this month's paper pumpkin.


  There are so many pieces in the two wood sheets you received.
I used the Wood Textures designer paper on all the cards I made.
I attached the wood elements with Tombow permanent glue.
I had some extra pearl embellishments left over from the paper pumpkin that I added to a few of the cards.


For the deer cards I used the Owl punch.  I punched out the owl body and cut off the feet and ears to make the deer head. 


You can see a little better in this photo the small pearl embellishments.
Most everything used on the cards are left over pieces from past paper pumpkins, including the stamps and ribbon. 
Look through your past pumpkins.  I know you have left over pieces you have just waiting to be put to use.

Tuesday, March 27, 2018

March 2018 Paper Pumpkin Wood Embellishments


What a great gift received in this month's paper pumpkin.
Not only did you get your paper pumpkin kit, you received two sheets of these wood embellishments.   
Once I looked at them, the leaves reminded me of deer antlers, so my creative mind went to work. 


I used the stampin write markers in Early Espresso shade to color in the antlers and ears.  
The ears are the small leaves in the wood kit. 
The designer paper is called Wood Textures.  I used the flowers and stamped in Early Espresso to create the swag behind the deer.


On my next post you will be able to see all the cards I was able to make with this generous amount of wood elements.  
To adhere them I used the Tombow permanent glue.

Sunday, March 25, 2018

Jar of Love


Hi friends!
Thank you for leaving me your sweet messages!
I love hearing what you would like to see when you come visit my blog.  It gives me an idea of what interest is out there.
With that being said...... drum roll please!
The two winners for the framed Spring Art are;
Carolee McCaslin and Karose!
Congrats!  
I will be mailing out your framed art once I received your mailing addresses


Back to our regularly scheduled blog post.....
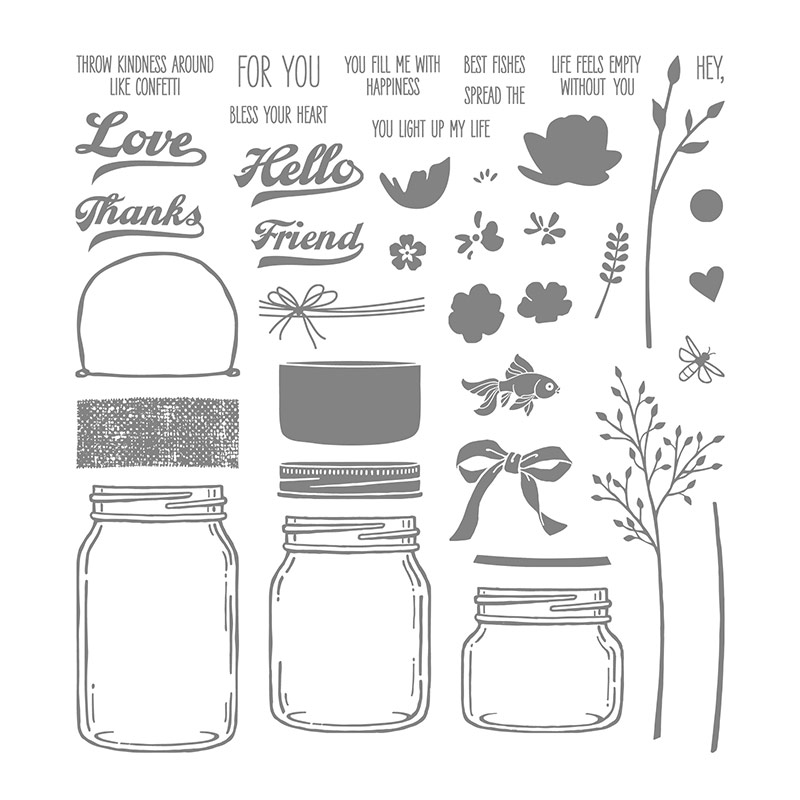
today's card is made with the every popular Jar of Love stamp set.

Don't have one yet?  Pick one up today with the framelits and receive a FREE gift!

Jar of Love
#141587 for $27.00
Jar Of Love Photopolymer Stamp Set

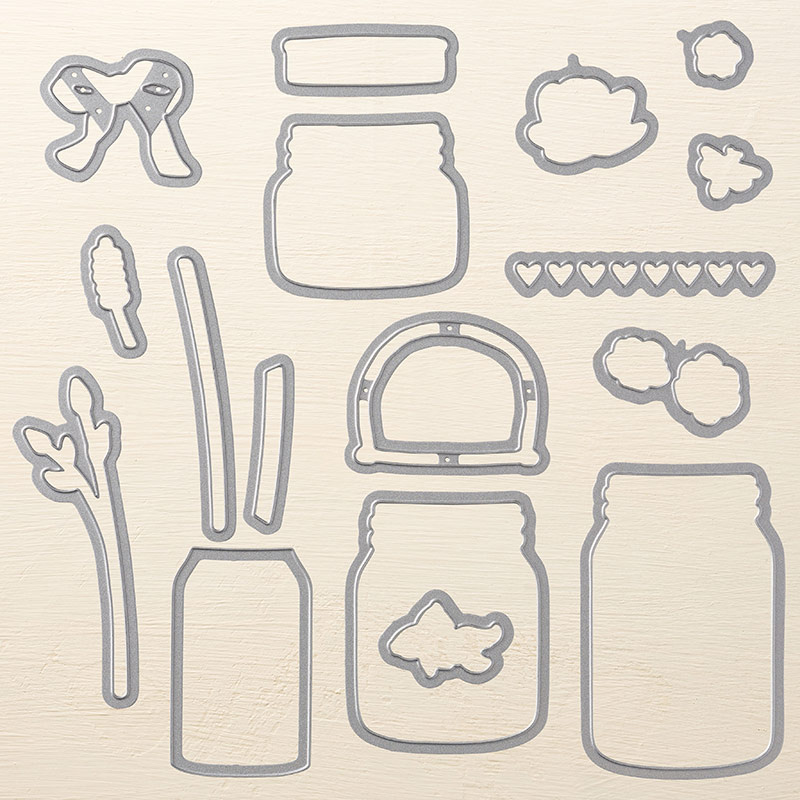
Matching Everyday Jar Framelits
#141490  for $33.00

By purchasing both the total is $60.00 which allows you a FREE item from the Sale a Bration catalog  HERE
Everyday Jars Framelits Dies

Friday, March 23, 2018

Stupid Dishes!


Don't you just hate it when you get home from where ever are and you walk in to a pile of dirty stupid dishes?!!!
Here's my new towel design up in my Etsy shop.
Head on over to grab yourself one, or two!
$10.00 each
Click Here  to visit my shop for even more designs

GIVEAWAY!!!!!!


How about we do a fun give away?
I have two of these super cute Spring framed art to go out to someone.
Leave me a message saying what you would like to see more of on my blog.  More DIY home decor ideas? or more cards? or something else? 
 Would LOVE to hear what you like to see when you come visit me.
I will choose two winners Saturday night at midnight.  
Your framed art will be shipped out monday morning.
Thanks for playing along friends and helping me to know what you like to see to inspire YOU!!!

Wednesday, March 21, 2018

Jar of Love


feeling all the spring love going on?  As I look through my instagram feed there are so many glass bottles and mason jars with beautiful greenery in them.   
That inspired this card.


Jar of Love is one of Stampin Up!'s most popular stamp sets.  
You can use it for so many ocassions and holidays as well as birthdays.  The color cardstocks I used are Pool Party, Pear Pizzaz and Whisper White.  
The jars are stamped in crumb cake and pool party.


The set can also be purchased with the matching framelits which allows you to cut out all the pieces in the set using the Big Shot Machine instead of fussy cutting out each little image.

Jar of Love
#141587 for $27.00
Jar Of Love Photopolymer Stamp Set

Everyday Jar Framelits
#141490  for $33.00
Everyday Jars Framelits Dies

Monday, March 19, 2018

May Good Things Grow


This month's Paper Pumpkin
May Good Things Grow


This month's kit is chalk full of cards and look how beautiful and vintage and springy they are!


I only changed a few things when I started making all the cards.  
I used all the pieces in the kit


The seeds envelopes are perfect for adding a envelope of seeds as  a gift for a co-worker or friend.


You can find the seed packages at the Dollar Tree 4 for $1.00
I should have used flower seed packs but my dollar tree was out of them so I ended up with herbs instead.


All of the pieces are from the kit


You can use and layer all the pieces with the dimensionals to make the cards look 3D.


Saturday, March 17, 2018

Bunnies and Chicks


 Last year I found these Dove Bunnies and Chicks for Easter and they are back again this year!
When I made them last year I only put bunnie bums on the bunnies, this year I decided on adding googlie eyes to the Chicks


The Dove candies can be found at Rite-aid 2 for $5


I used a glue gun to attach the eyes and tails to the candy.
You may think that it would melt the chocolate, but it didn't. 
You can use glue dots, which would be probably be better,
 I just felt like using the glue gun, as it allowed me to go faster for as many as I made.


The mini pom poms and googlie eyes can be found at your local craft store.


Cute little chickie!


Friday, March 16, 2018

Easter Decor


Spring has sprung over here, that means time for Easter/Spring decor!  I know I will get asked where I found this galvanized 3 tier tray so here goes.  It's from Hobby Lobby, either online or store and if you hit the sale then the cost is just $19.00.


I added the Rae Dunn Hip and Hop mugs with some distressed eggs and grass.  Try and look around your house to see what you have on hand before you go out to buy.  Sometimes we have sooo much in cupboard and closets that we forget what we have!


I found the chippy vintage window at a garage sale for $15.
Added the wreath and sign and the Easter banner to decorate it for Easter.